Ahh, the final chapter! Two years of blood, sweat, and code, all packed into 8 posts. Can you believe we’re here? In this last post, I’m diving into some cool features of the Web App that will make your life a lot easier and your PowerBox experience even smoother.
By now, I’m hoping your setup is all good to go, and you’ve connected to the WebApp from any device on your network. If not, no worries! We’re almost there.
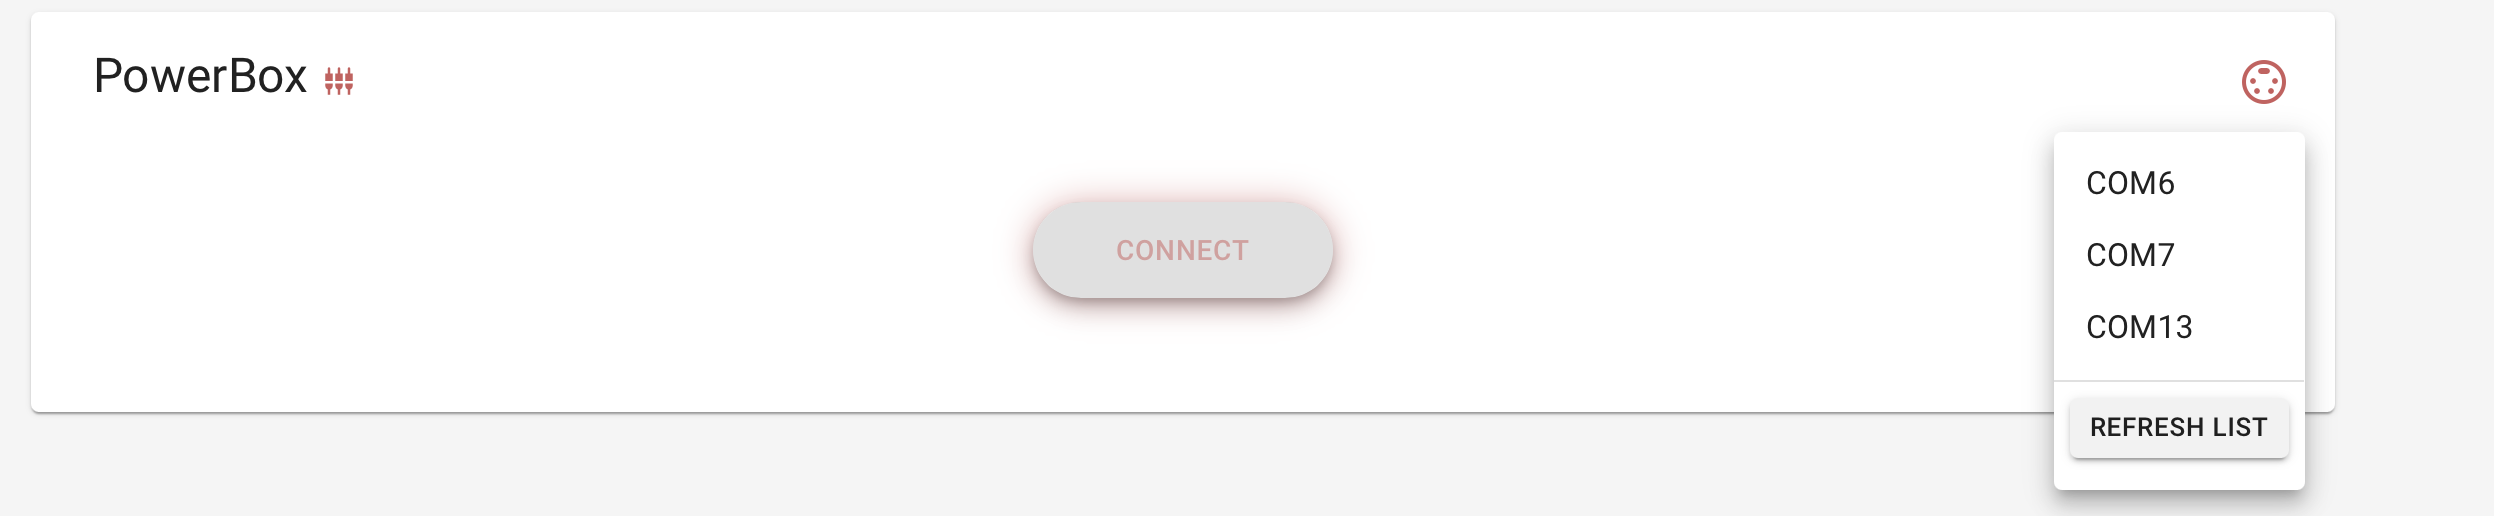
Before You Connect:
When you first fire up the Web App, if the box isn’t connected, you’ll just see a “Connect” button and a little icon to choose your COM port. Once that’s done, buckle up—you’re about to see some awesome features!
Main Page (Home Tab):
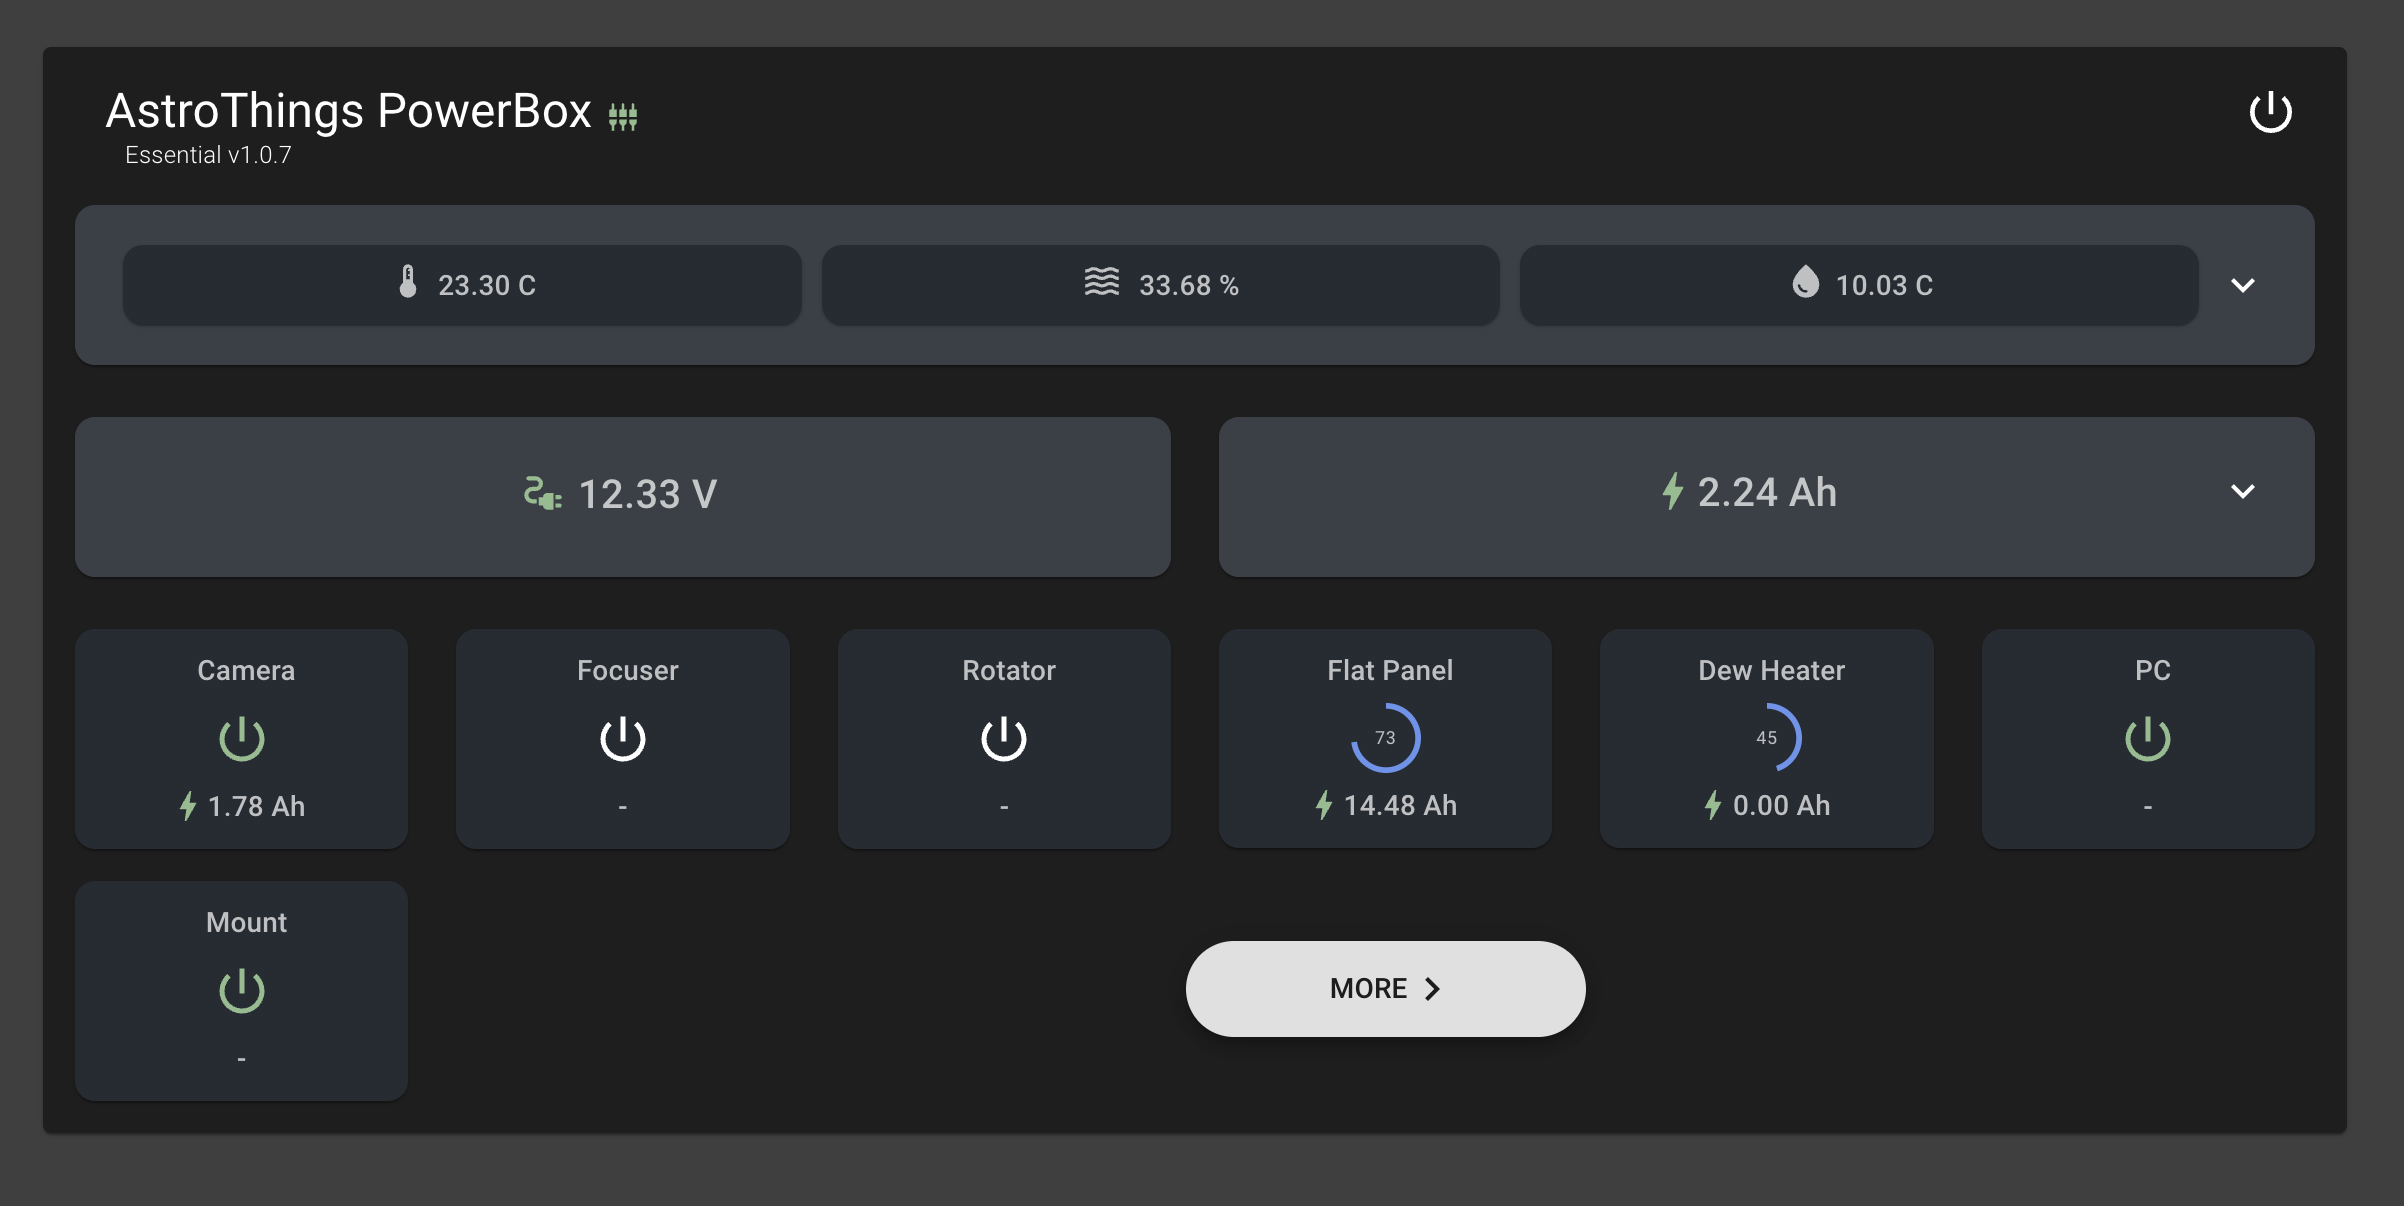
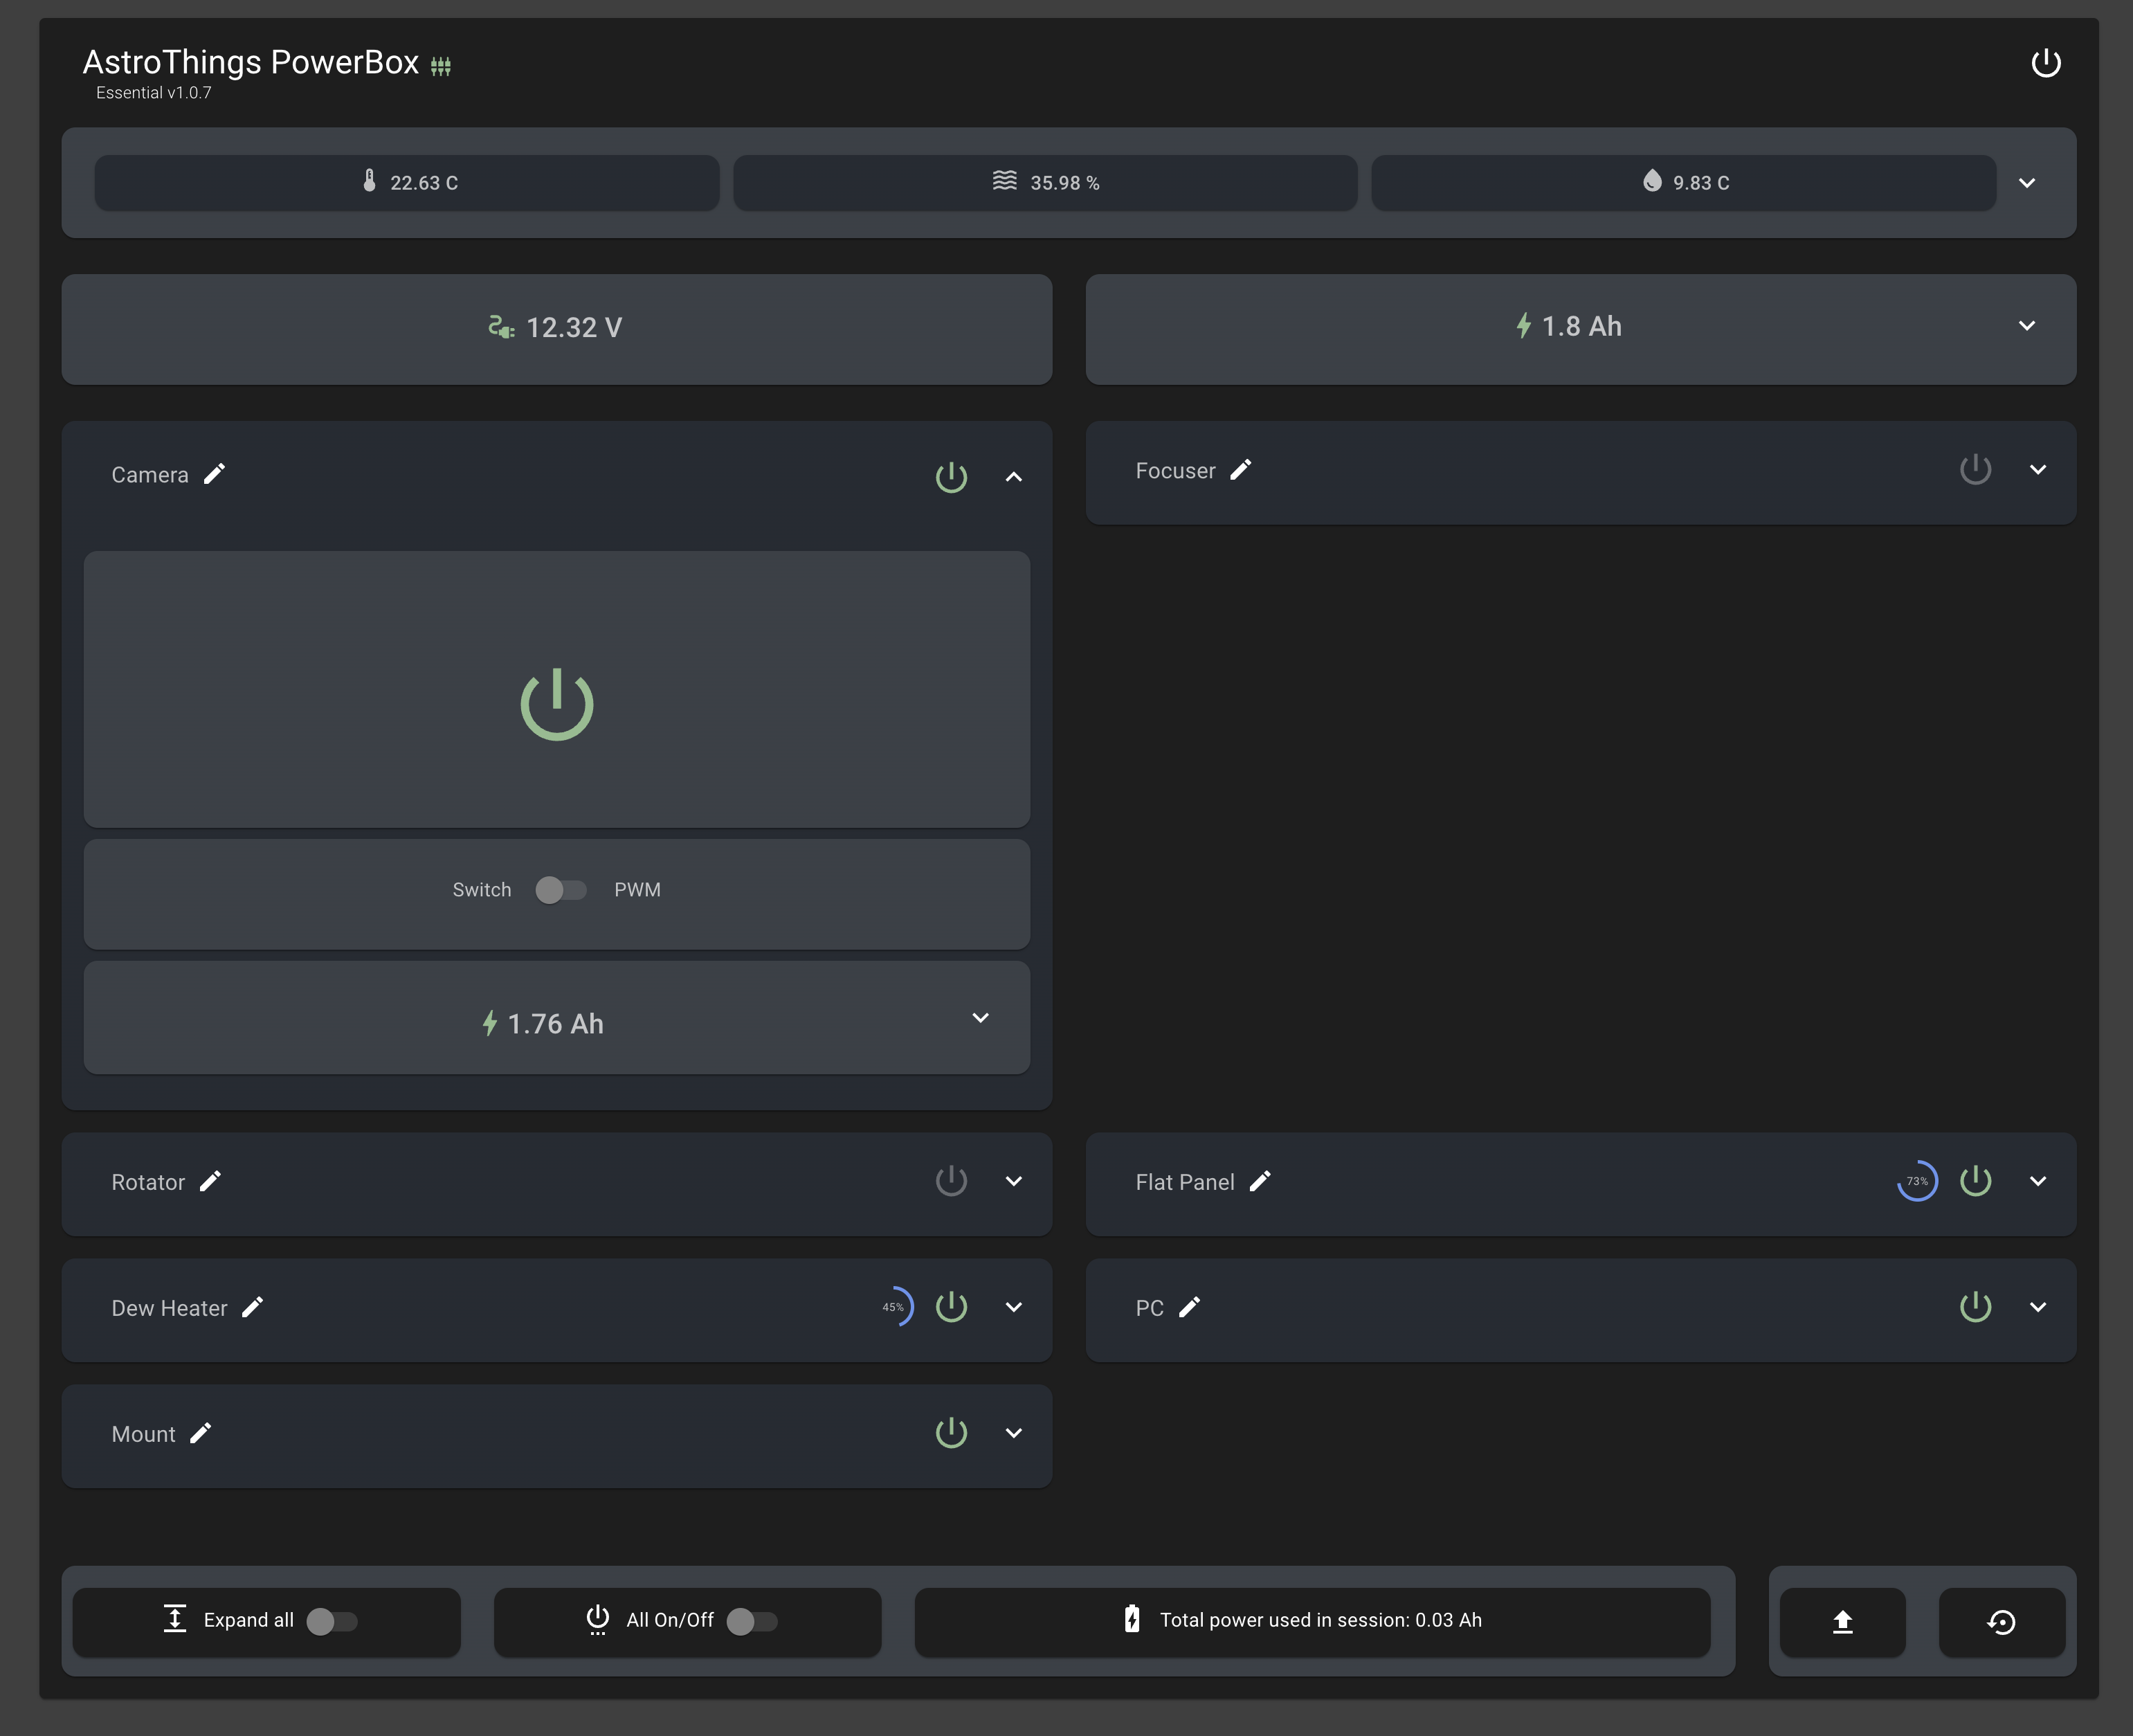
The Home Tab gives you a quick, high-level look at everything going on with your PowerBox.
-
PowerBox Version & Firmware Version:
- Up top on the left side of the card, you’ll spot the version and firmware info. Oh, and if you’ve got an external sensor plugged in, a shiny new icon will appear next to it.
-
Power Icon:
- On the top right, you’ve got the power icon. Click it and—BOOM!—disconnect the box.
-
Temperature, Humidity, Dew Point:
- Want to see the history? Hit that little down arrow, and you’ll open a chart with all the past readings.
-
Main Input Voltage & Total Amps:
- Same deal! Hit the down arrow for the history chart of input voltage and amps.
-
All Inputs & Their Status:
- You’ll see on/off for regular inputs and power levels for PWM ones, plus total amps drawn from each input.
- Click on any input, and you can toggle it on or off.
-
“More” Button:
- Want a closer look? Click on “More,” and you’ll be transported to a more detailed view of your PowerBox.
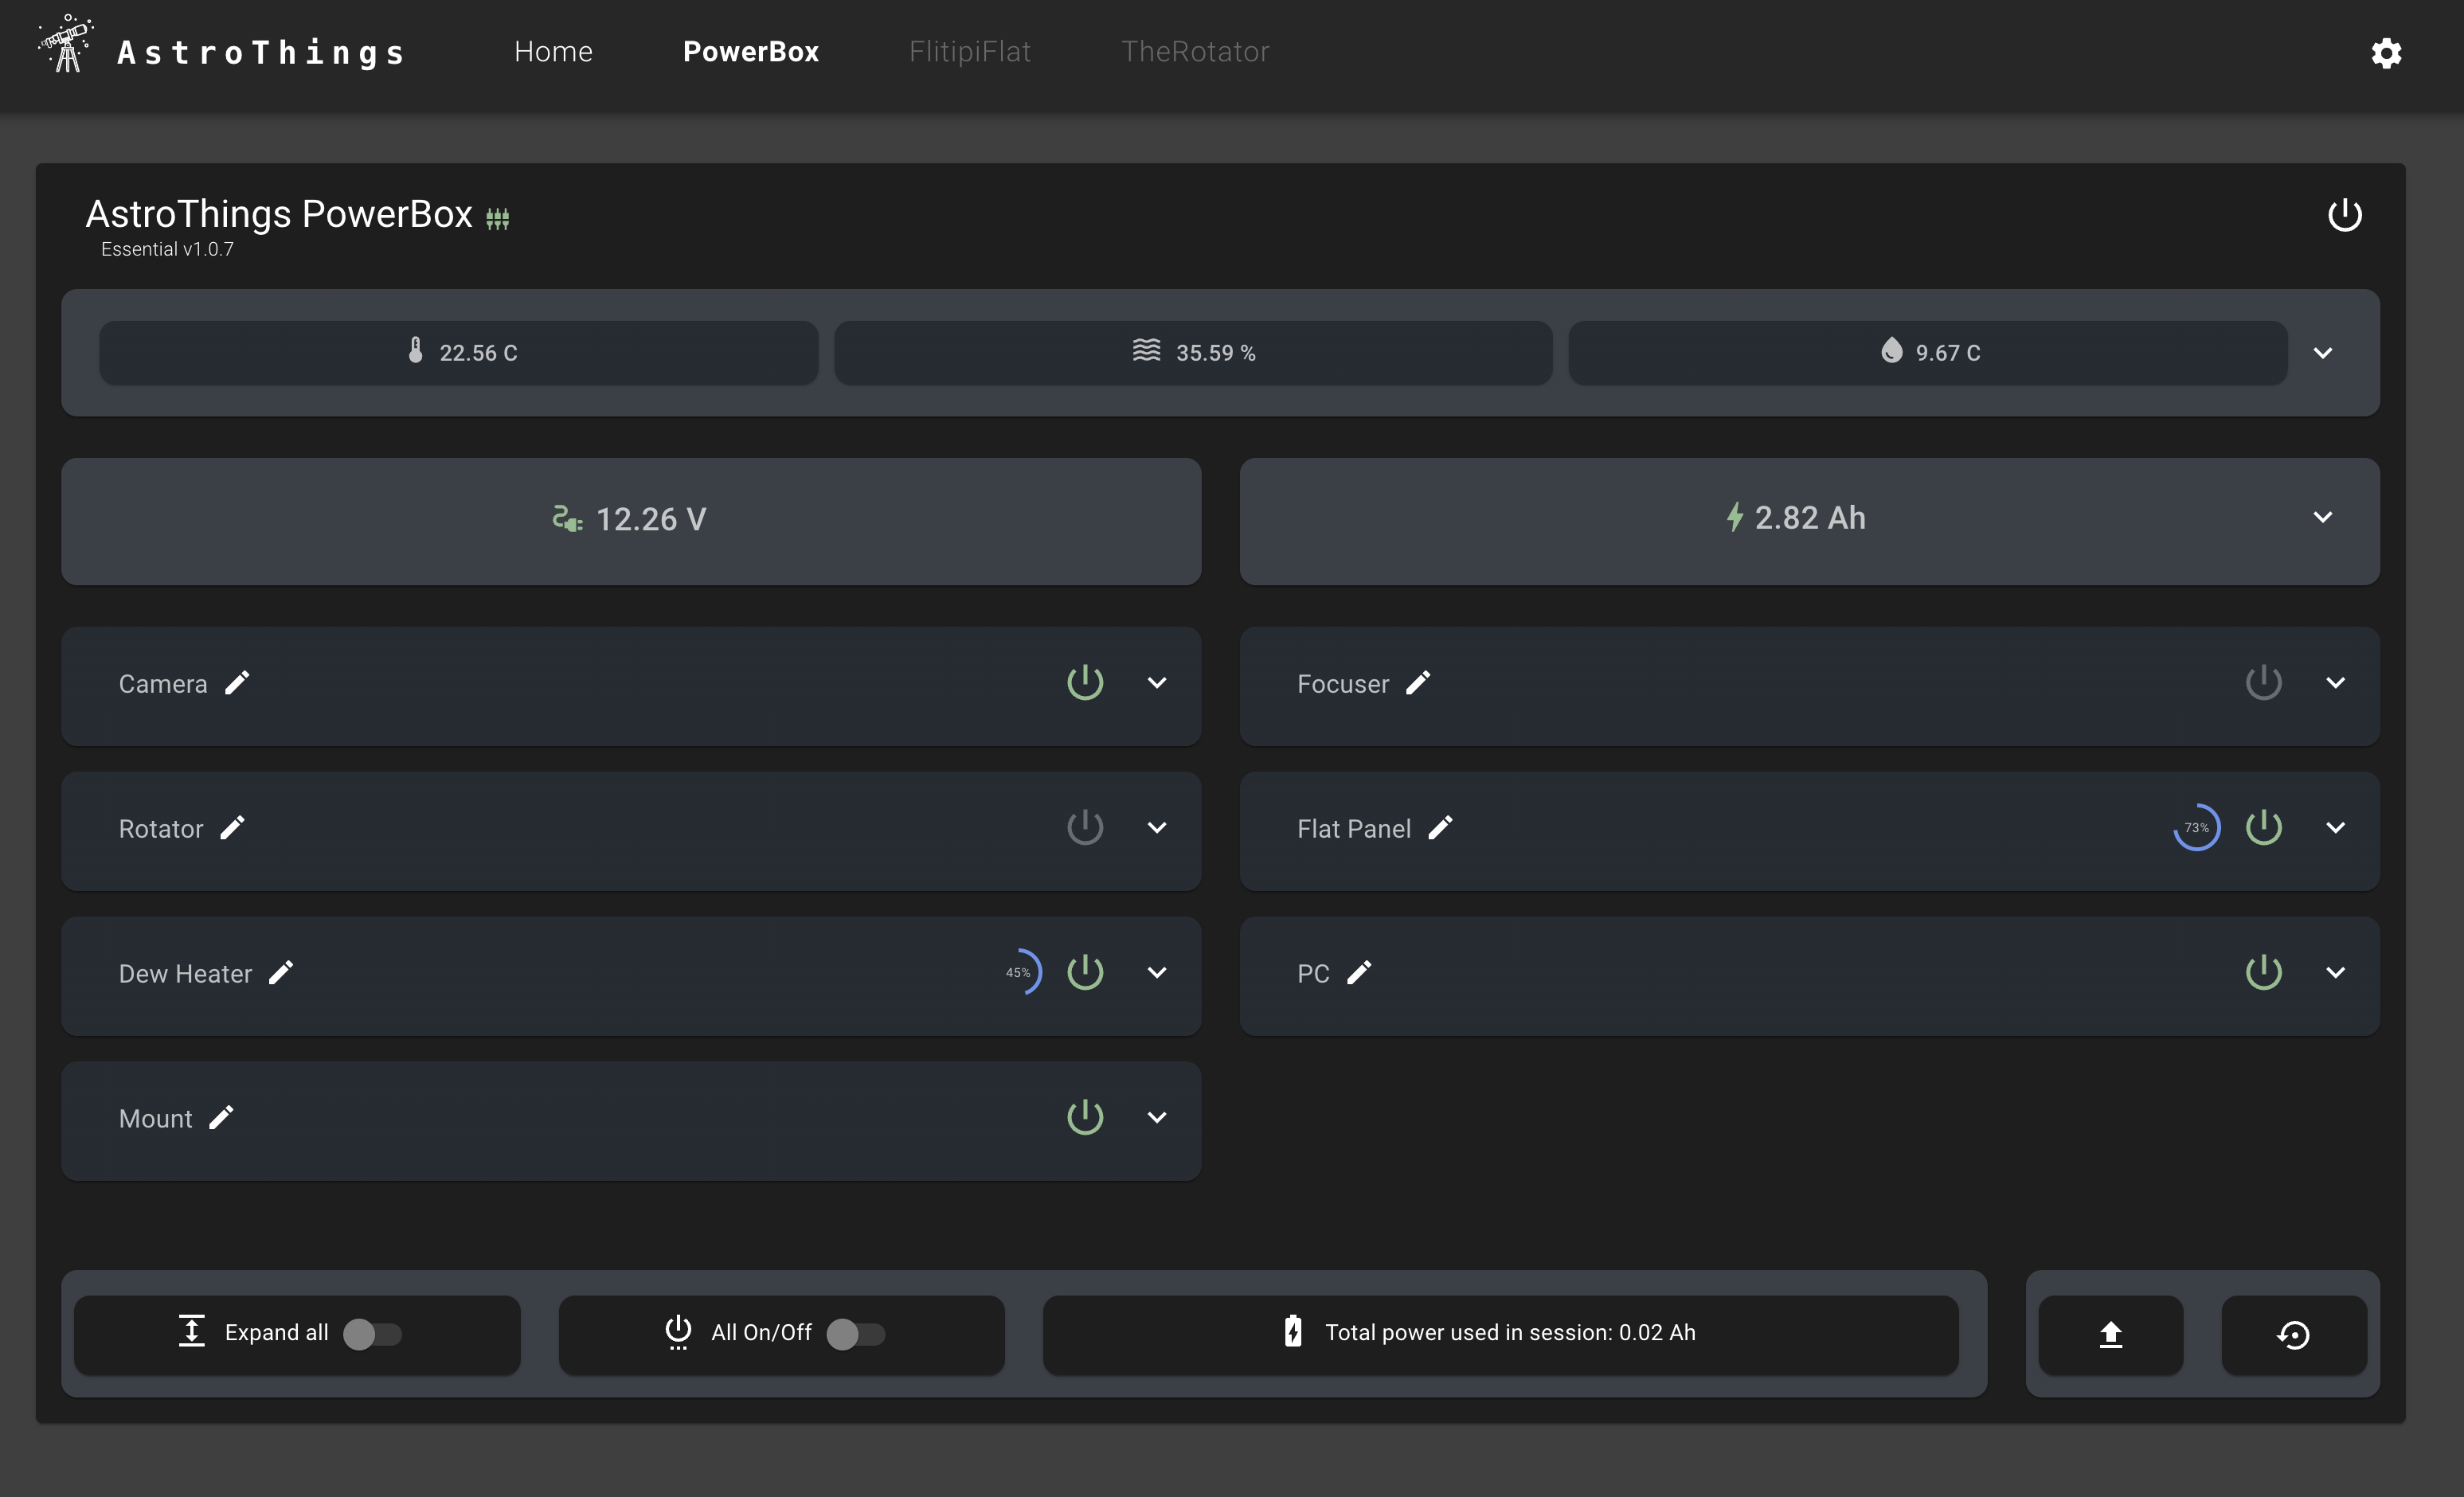
Detailed Page (PowerBox Tab):
Clicking that “More” button opens up a treasure trove of info in the PowerBox tab.
-
PowerBox Version & Firmware Version:
- Yep, you’ll see it here too—just in case you forgot.
-
Power Icon:
- Disconnect the box with a single click! (You’re in control here.)
-
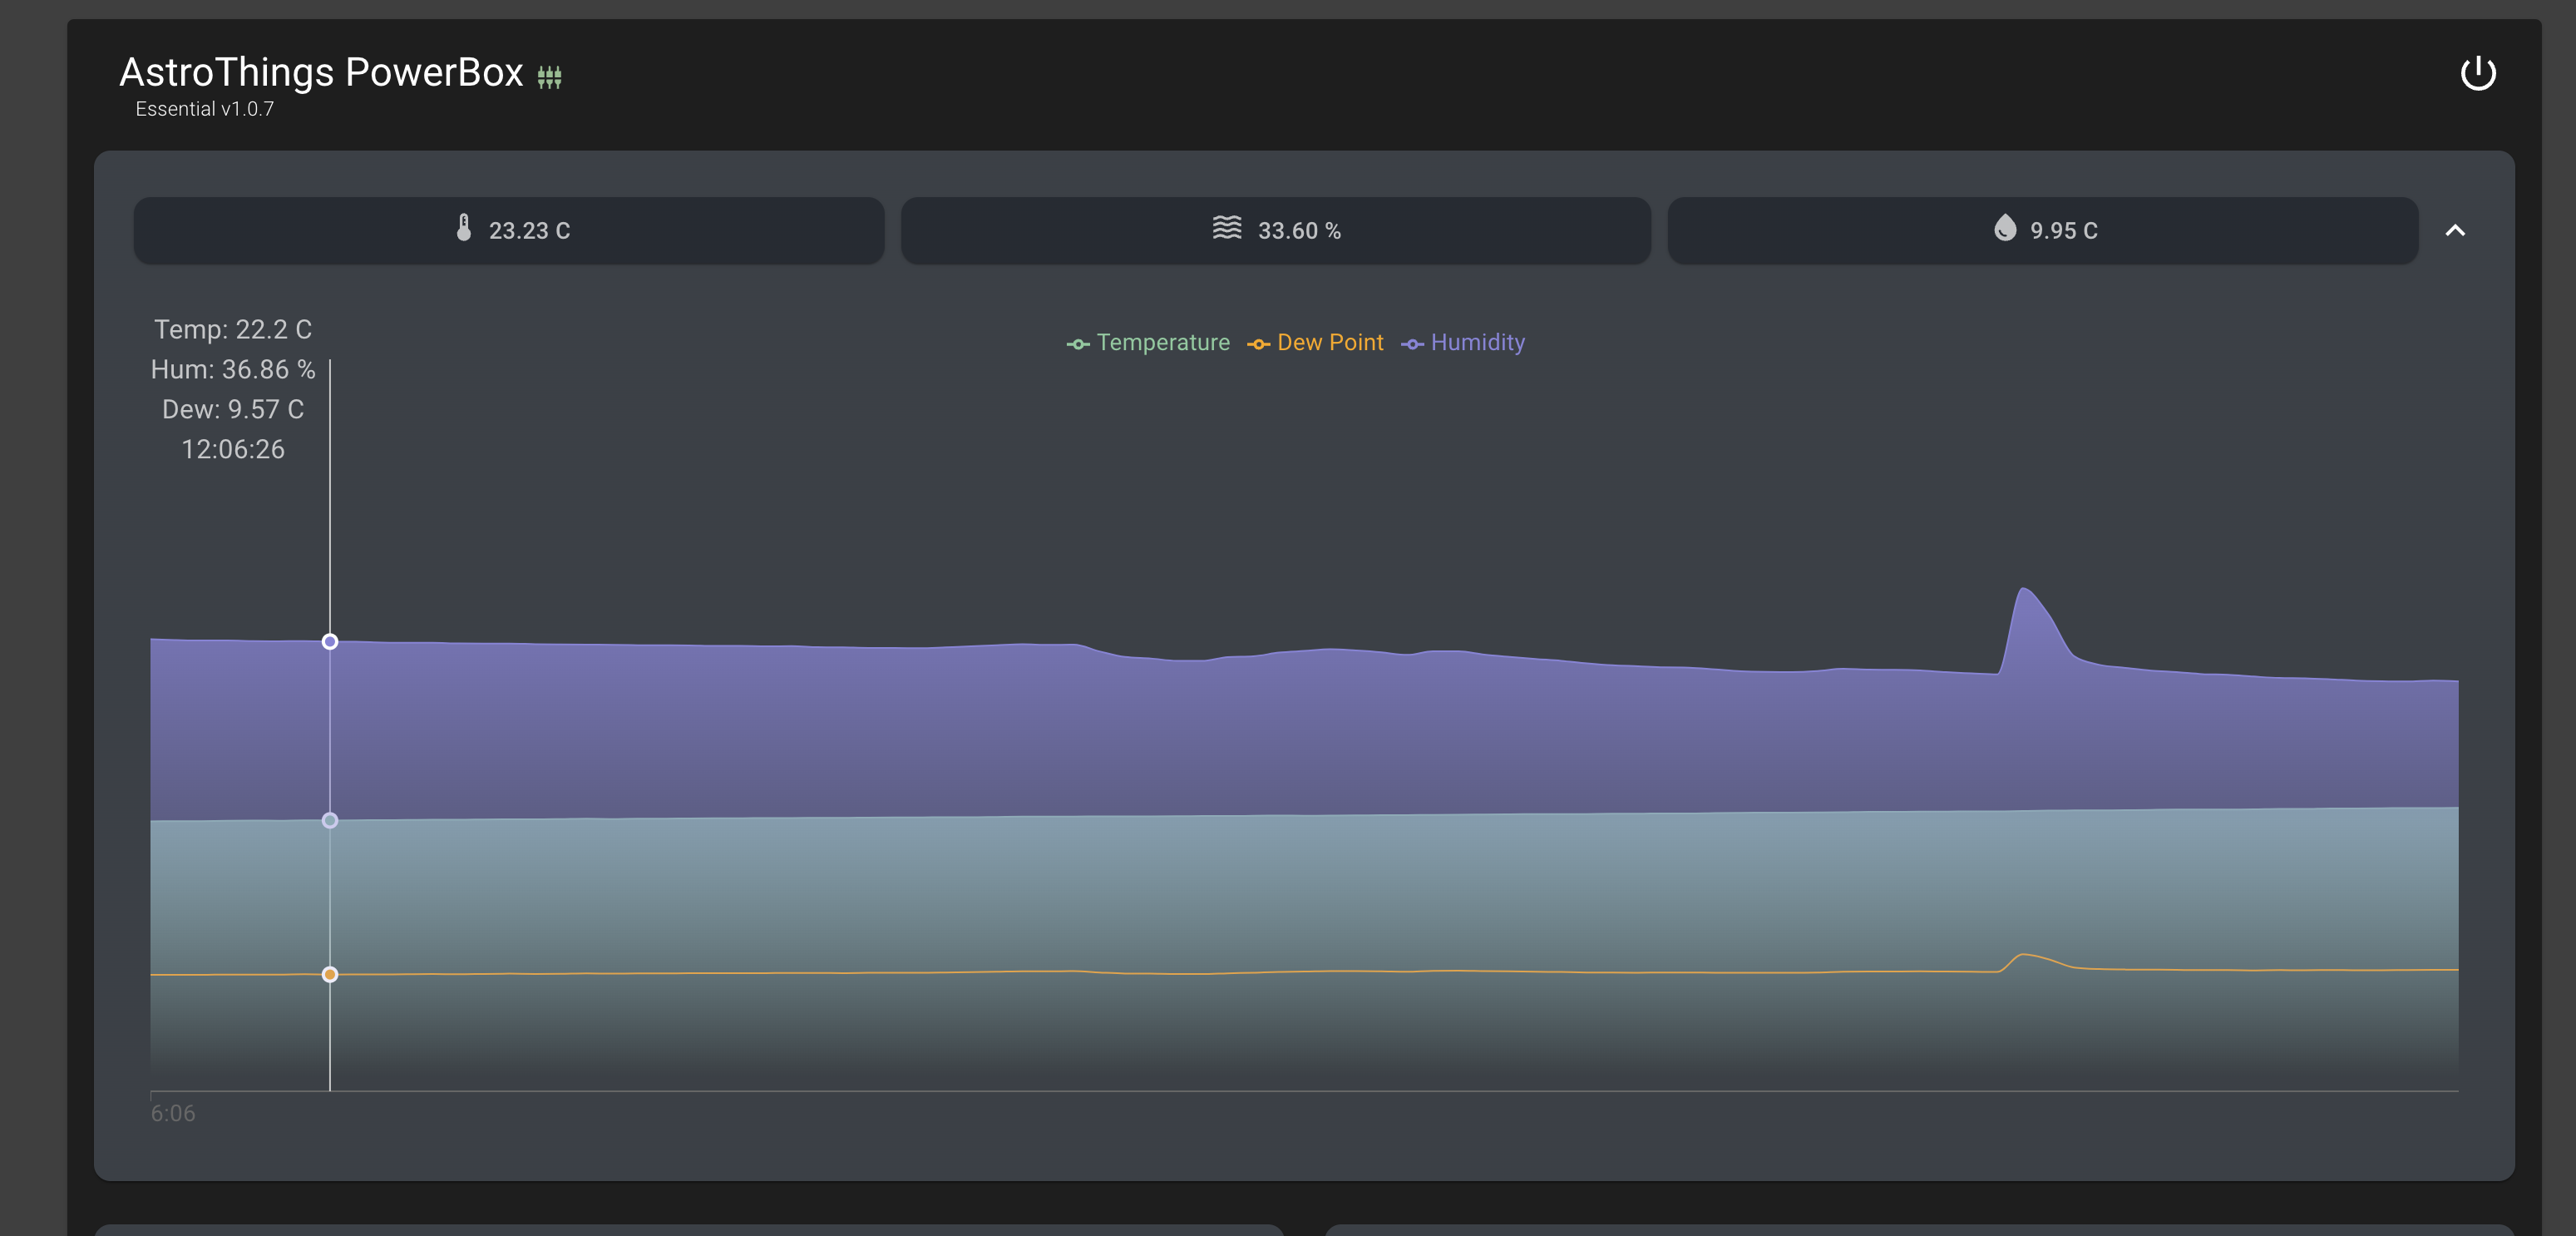
Temperature, Humidity, Dew Point:
- As usual, hit the down arrow for the history charts.
-
Main Input Voltage & Total Amps:
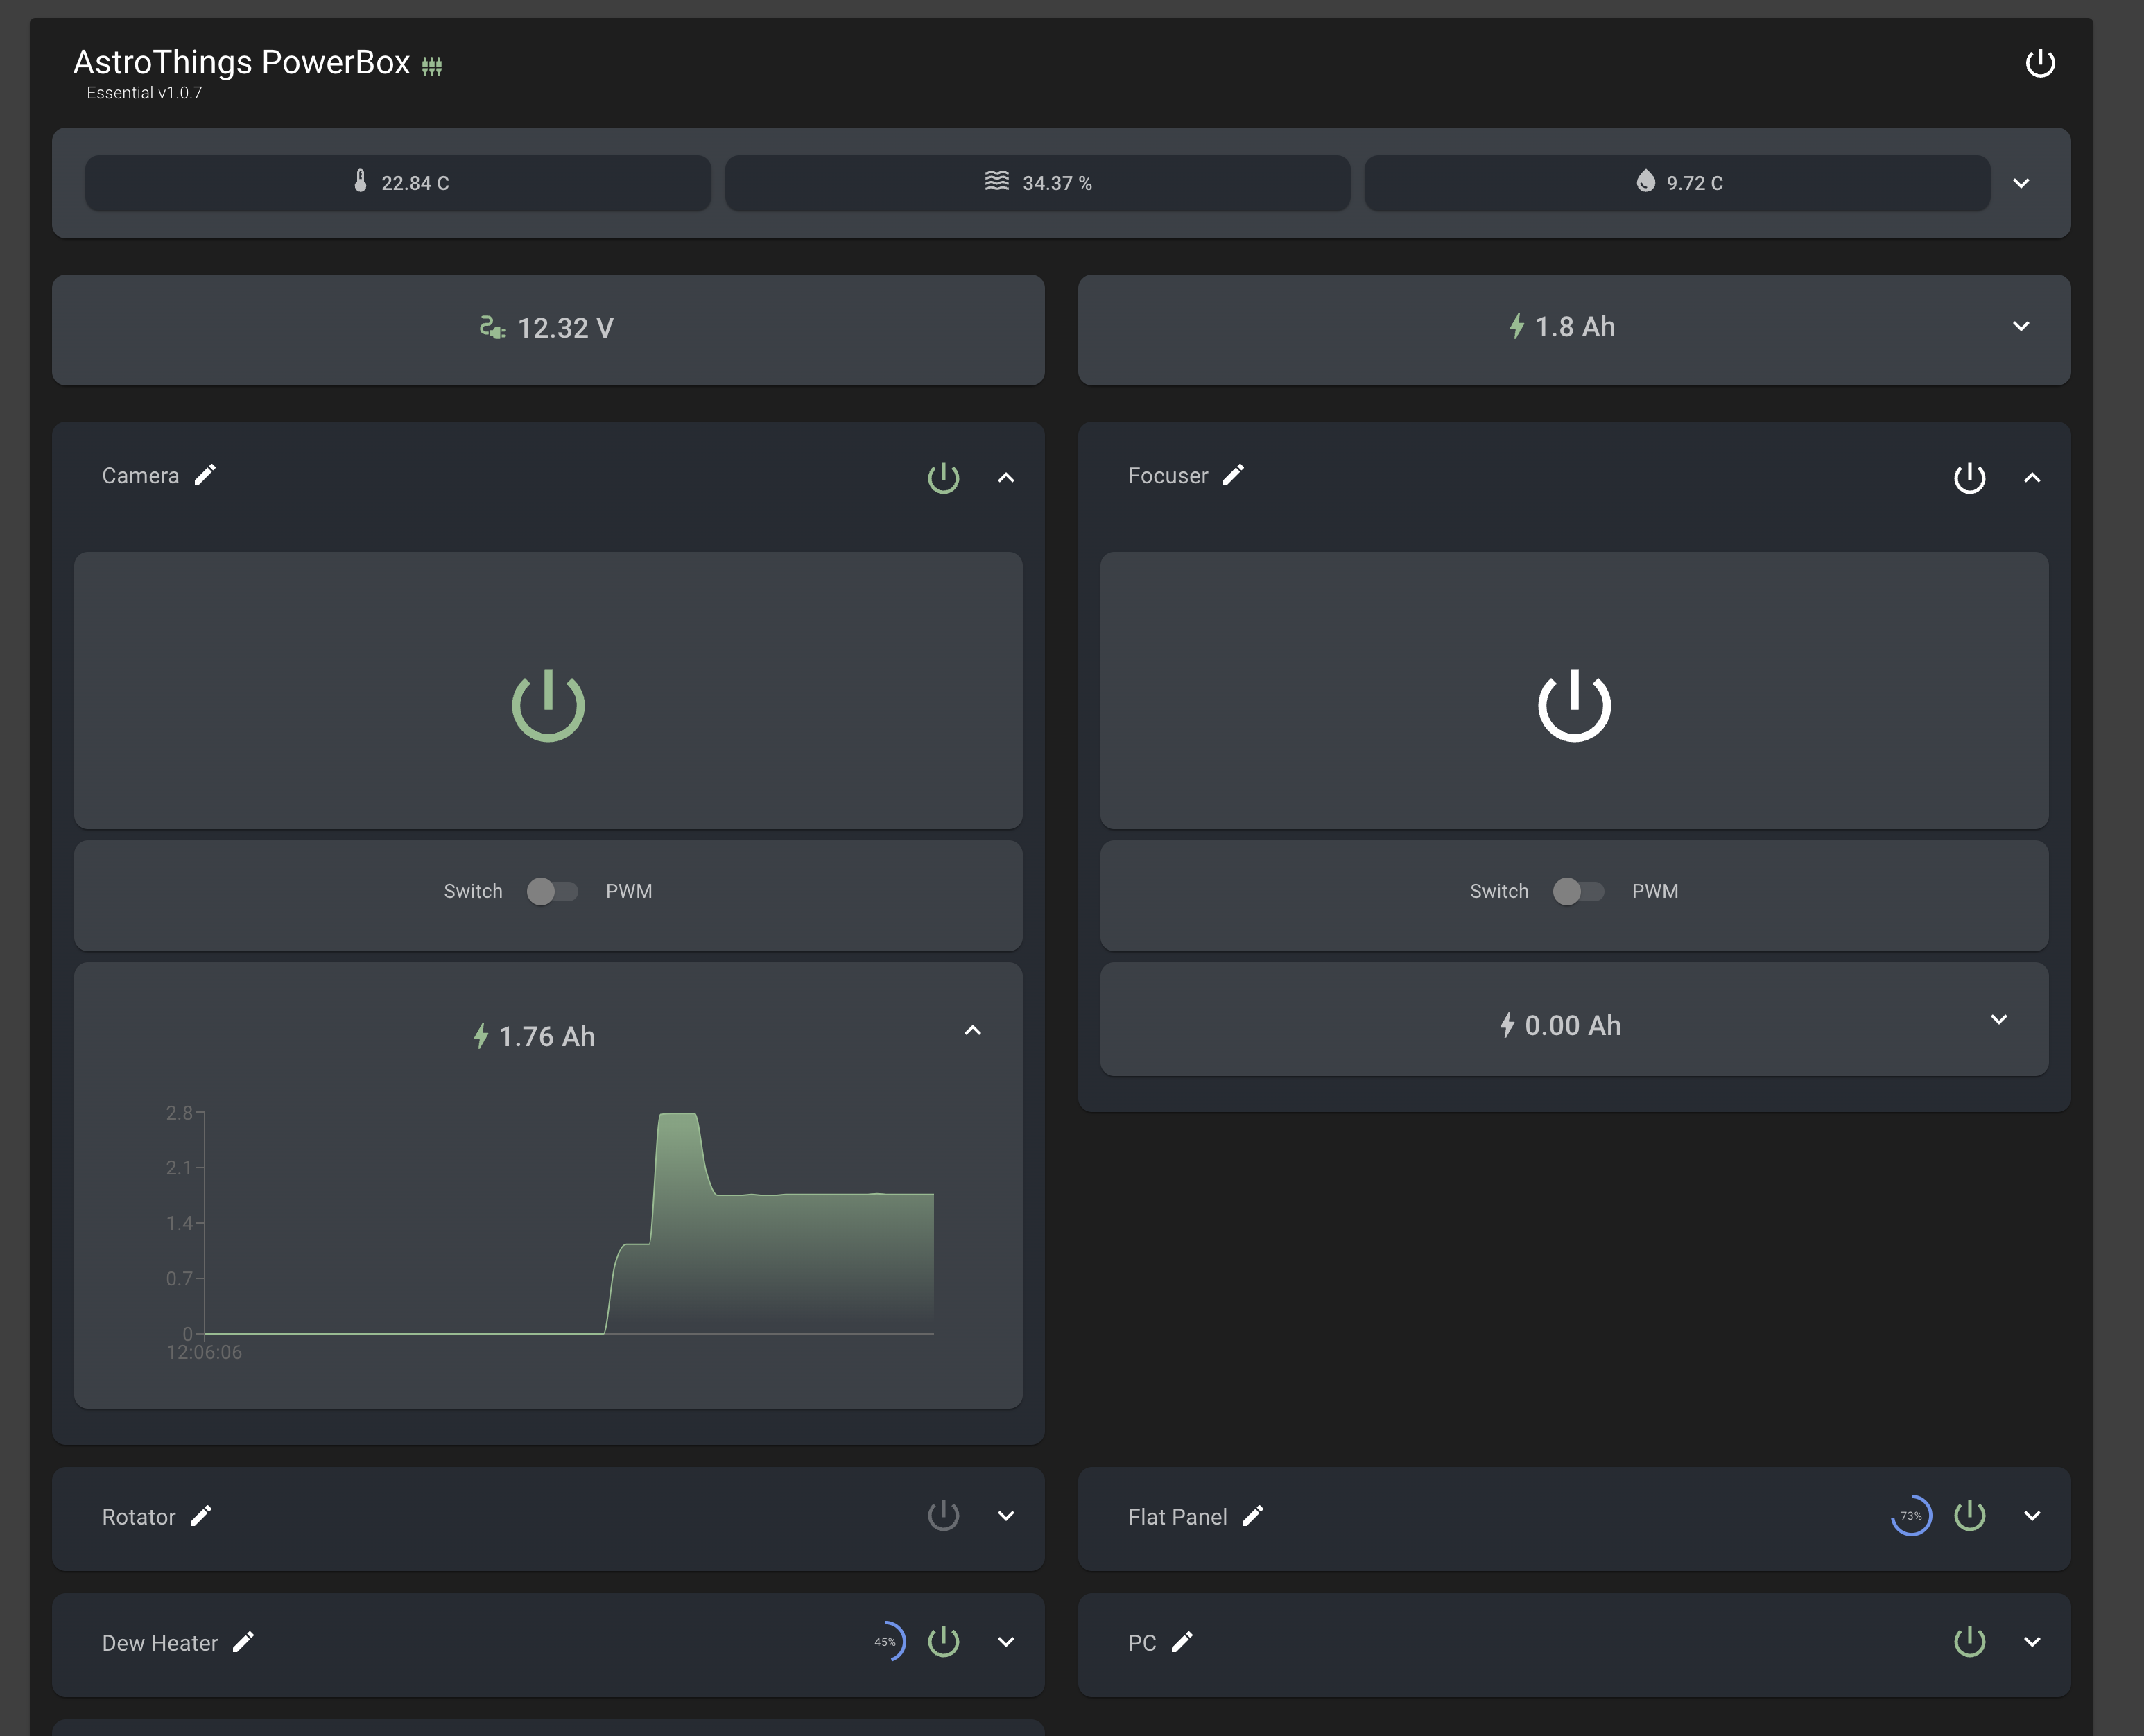
- Expand this to view a chart with historical data.
-
All Inputs & Their Status:
-
Click on any input to get the full scoop:
- Rename: Got an input with a funny name? Change it with the pencil icon.
- Power: Turn it on or off with the power button.
- Type: Choose between a simple on/off switch or PWM input (great for accessories like dew heaters).
- Auto Dew Control: If it’s PWM, you can activate Auto Dew Control, which automatically adjusts power based on temperature and humidity.
- Slider: For PWM, you can tweak the power level with a handy slider.
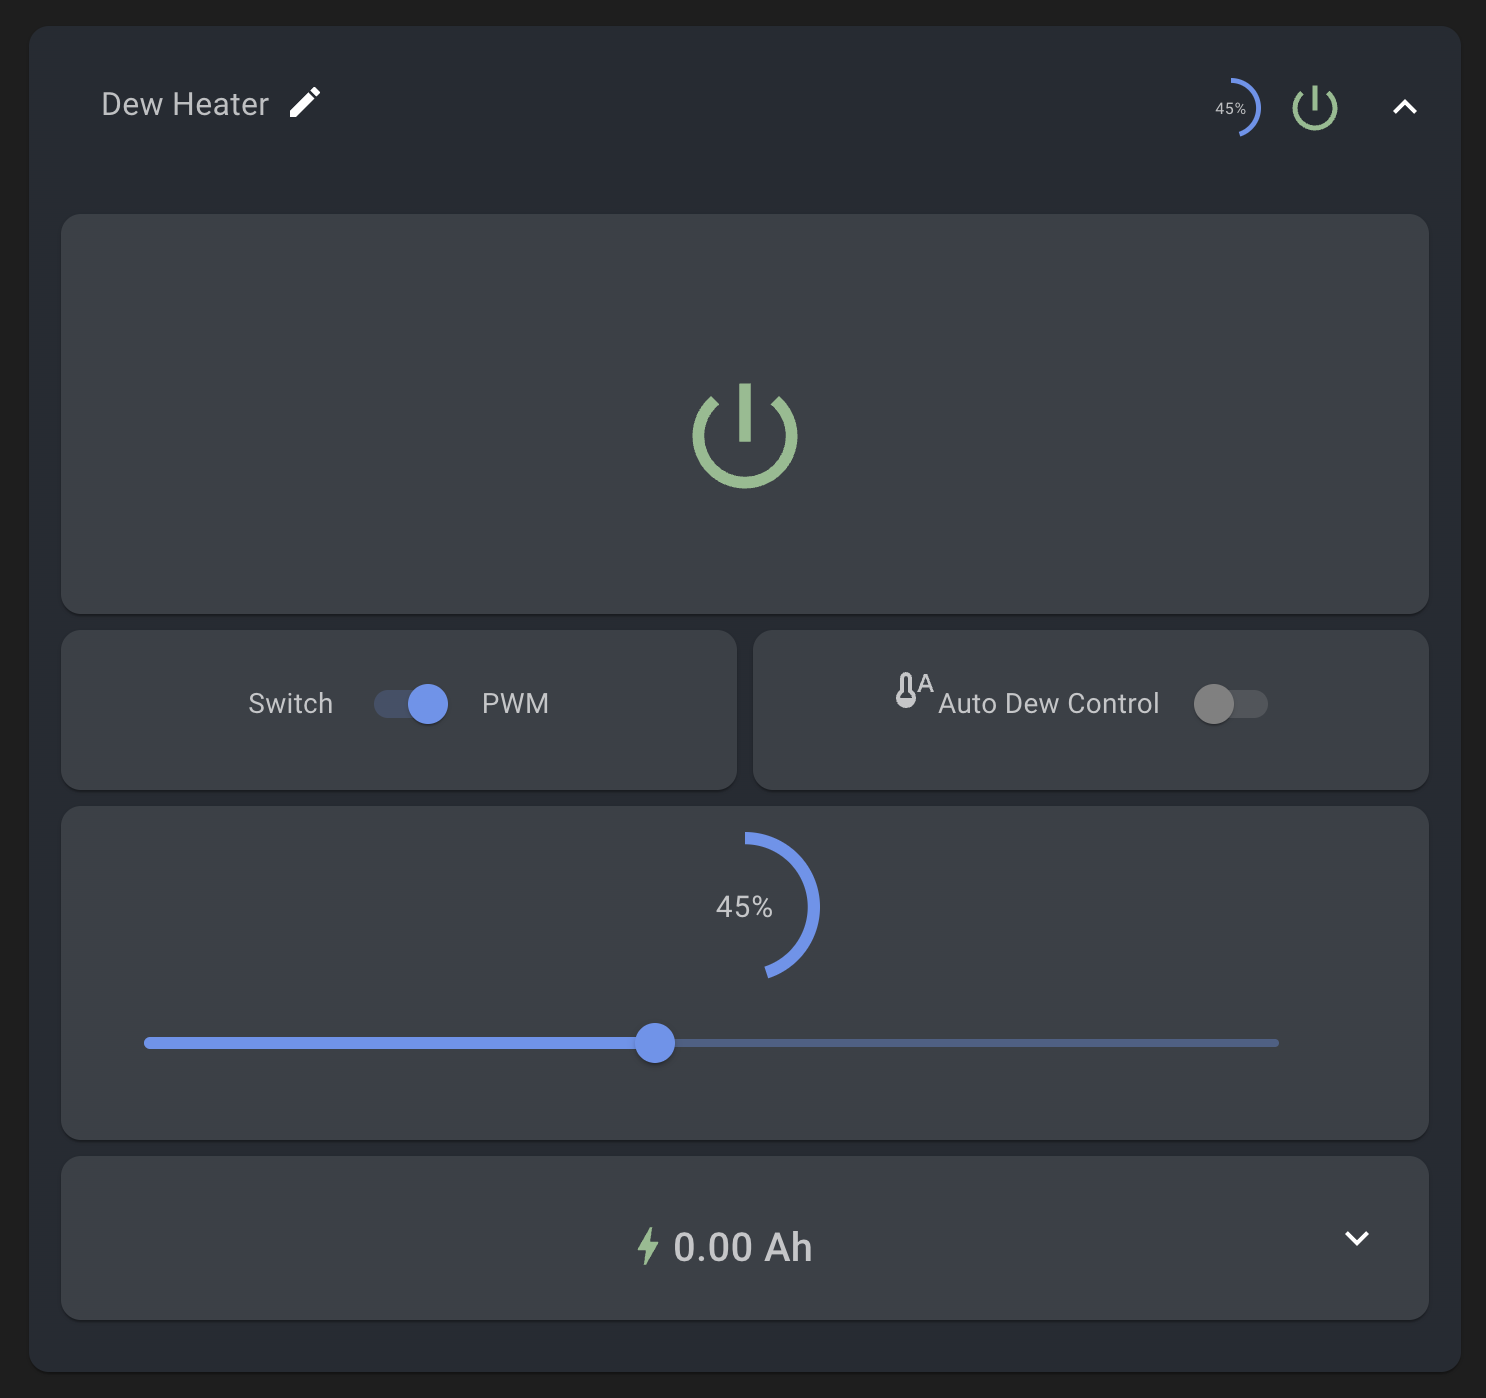
- Amps: You’ll see how many amps are drawn from that input, plus a history chart for deep dives.
-
Bottom of the Page:
- Expand All Inputs: Need a quick overview? Expand all inputs in one go.
- Turn Everything On/Off: Power control at your fingertips.
- Total Power Used: Keep an eye on the total power consumed in the session (in Ah).
- Update Firmware: If there’s a new firmware version, just upload it with the “_Update” hex file.
- Reset: Back to defaults? Hit that button and start fresh.
N.I.N.A or Other Software Control:
Once you’ve installed the Dynamic Alpaca Driver (check the previous post), you’re ready to connect your box to N.I.N.A (or any other astrophotography software).
-
Gauges:
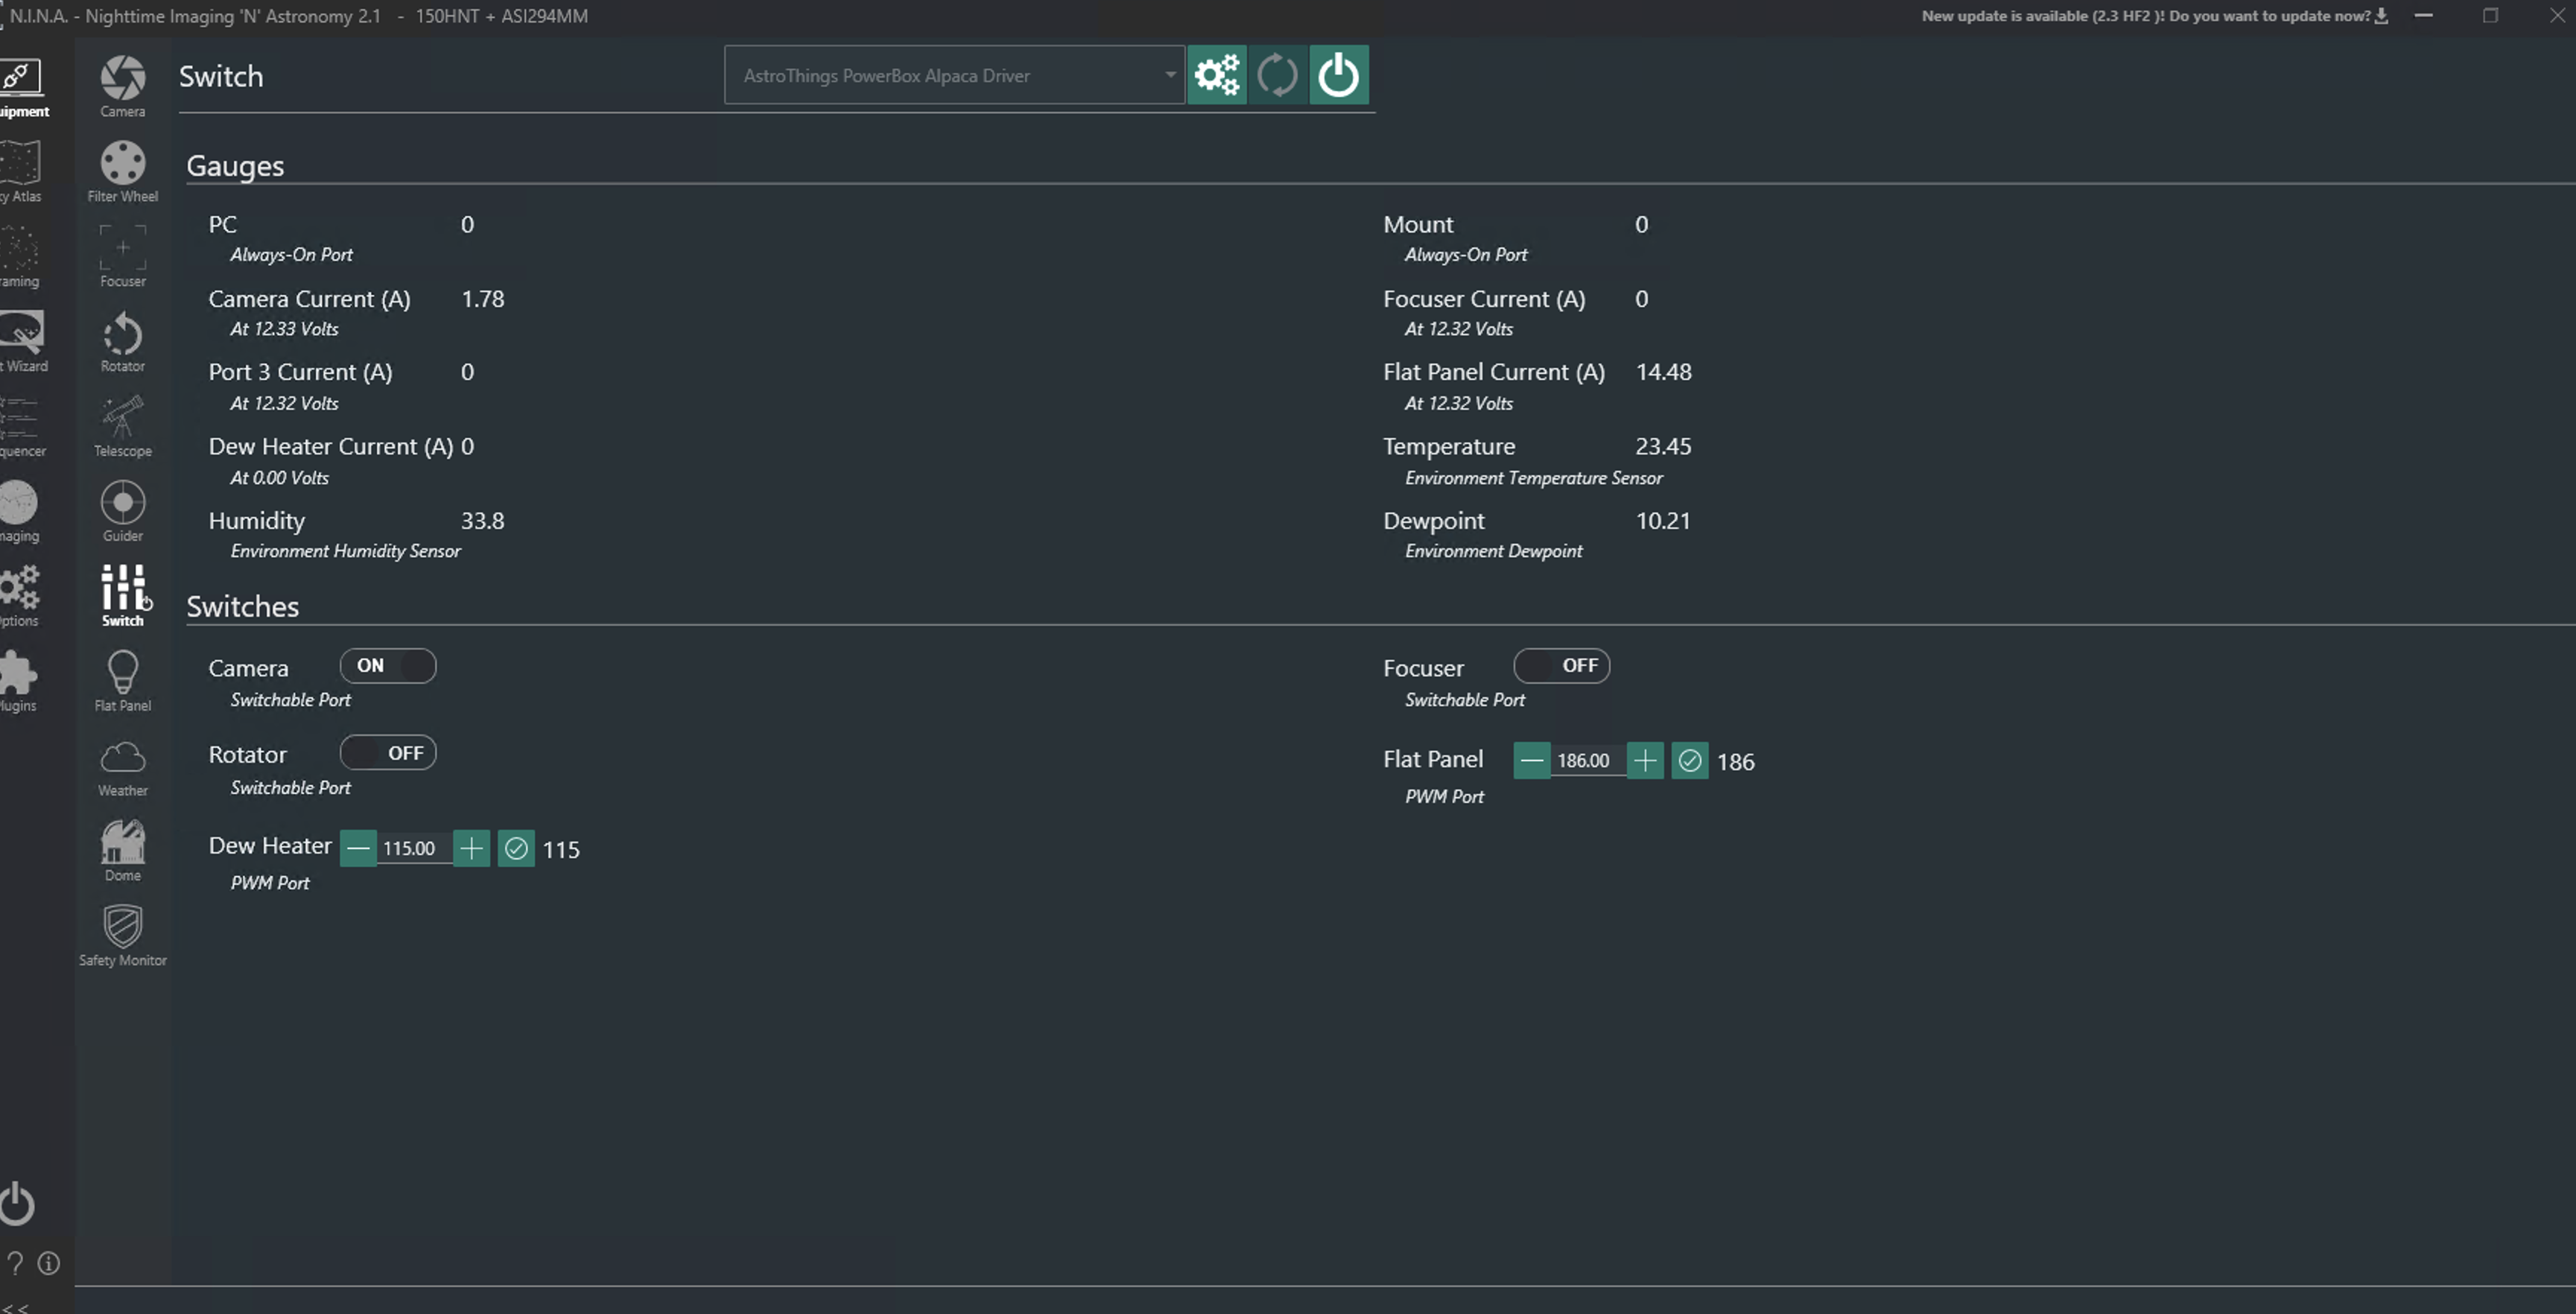
- The top section shows amps for each input, plus temperature, humidity, and dew point readings.
-
Switches:
- The bottom section gives you control over your switches, depending on how you’ve configured them (regular switch or PWM).
A Few Quick Notes:
-
Multiple Devices:
- Access the Web App from multiple devices, and they’ll all show the same data in real-time.
-
Syncing Between Web App & Software:
- Changes made in your astrophotography software (like turning inputs on or off) will show up in the Web App after a few seconds—and vice versa.
- Input name or type changes will only appear in the software after you disconnect and reconnect.
-
Software Connection Issue?
- If your software can’t connect to the box, make sure you’re connected in the Web App first, and you’ve selected the correct COM port.
-
Disaster Recovery:
- If the whole thing stops working, don’t panic. I’ve included an .ino file in the GitHub repository that you can upload to the PowerBox via Arduino IDE. After that, you’ll need to upload the firmware again (check the previous post for those avrdude instructions).
And That’s a Wrap!
Two years of work and a ton of fun, all packed into one epic project. I’m so glad you stuck with me, and I hope you learned a lot along the way. This is just the beginning—I’m excited to keep contributing to the Astro community!
Got questions? Don’t hesitate to reach out to me here or start a new discussion on the GitHub repository. I’m always happy to chat!
Send me an email or use the contact form
Want to buy me beer 🍻? Use this link
Until next time,
~TheBrightKnight