Ah, software—usually my favorite part.
 And when I say usually, it’s because, under normal circumstances, I get to choose the tech stack I want to develop with. But this time? The drivers had to be ASCOM-compatible, which meant working within their framework.
That changed later on…
Let’s rewind and break down exactly what we needed.
1. Firmware – The Brain of the Operation
This is what we upload to the microcontroller on the PCB. It’s responsible for handling logic and controlling components based on commands received over Serial from the computer.
For example:
- The computer requests the current state of a specific output.
- The microcontroller checks the component’s status and sends a response back — on or off.
I built a large command directory to control components, retrieve data, save settings (like output states and names), and manage core functions.
2. ASCOM Driver – The Middleman
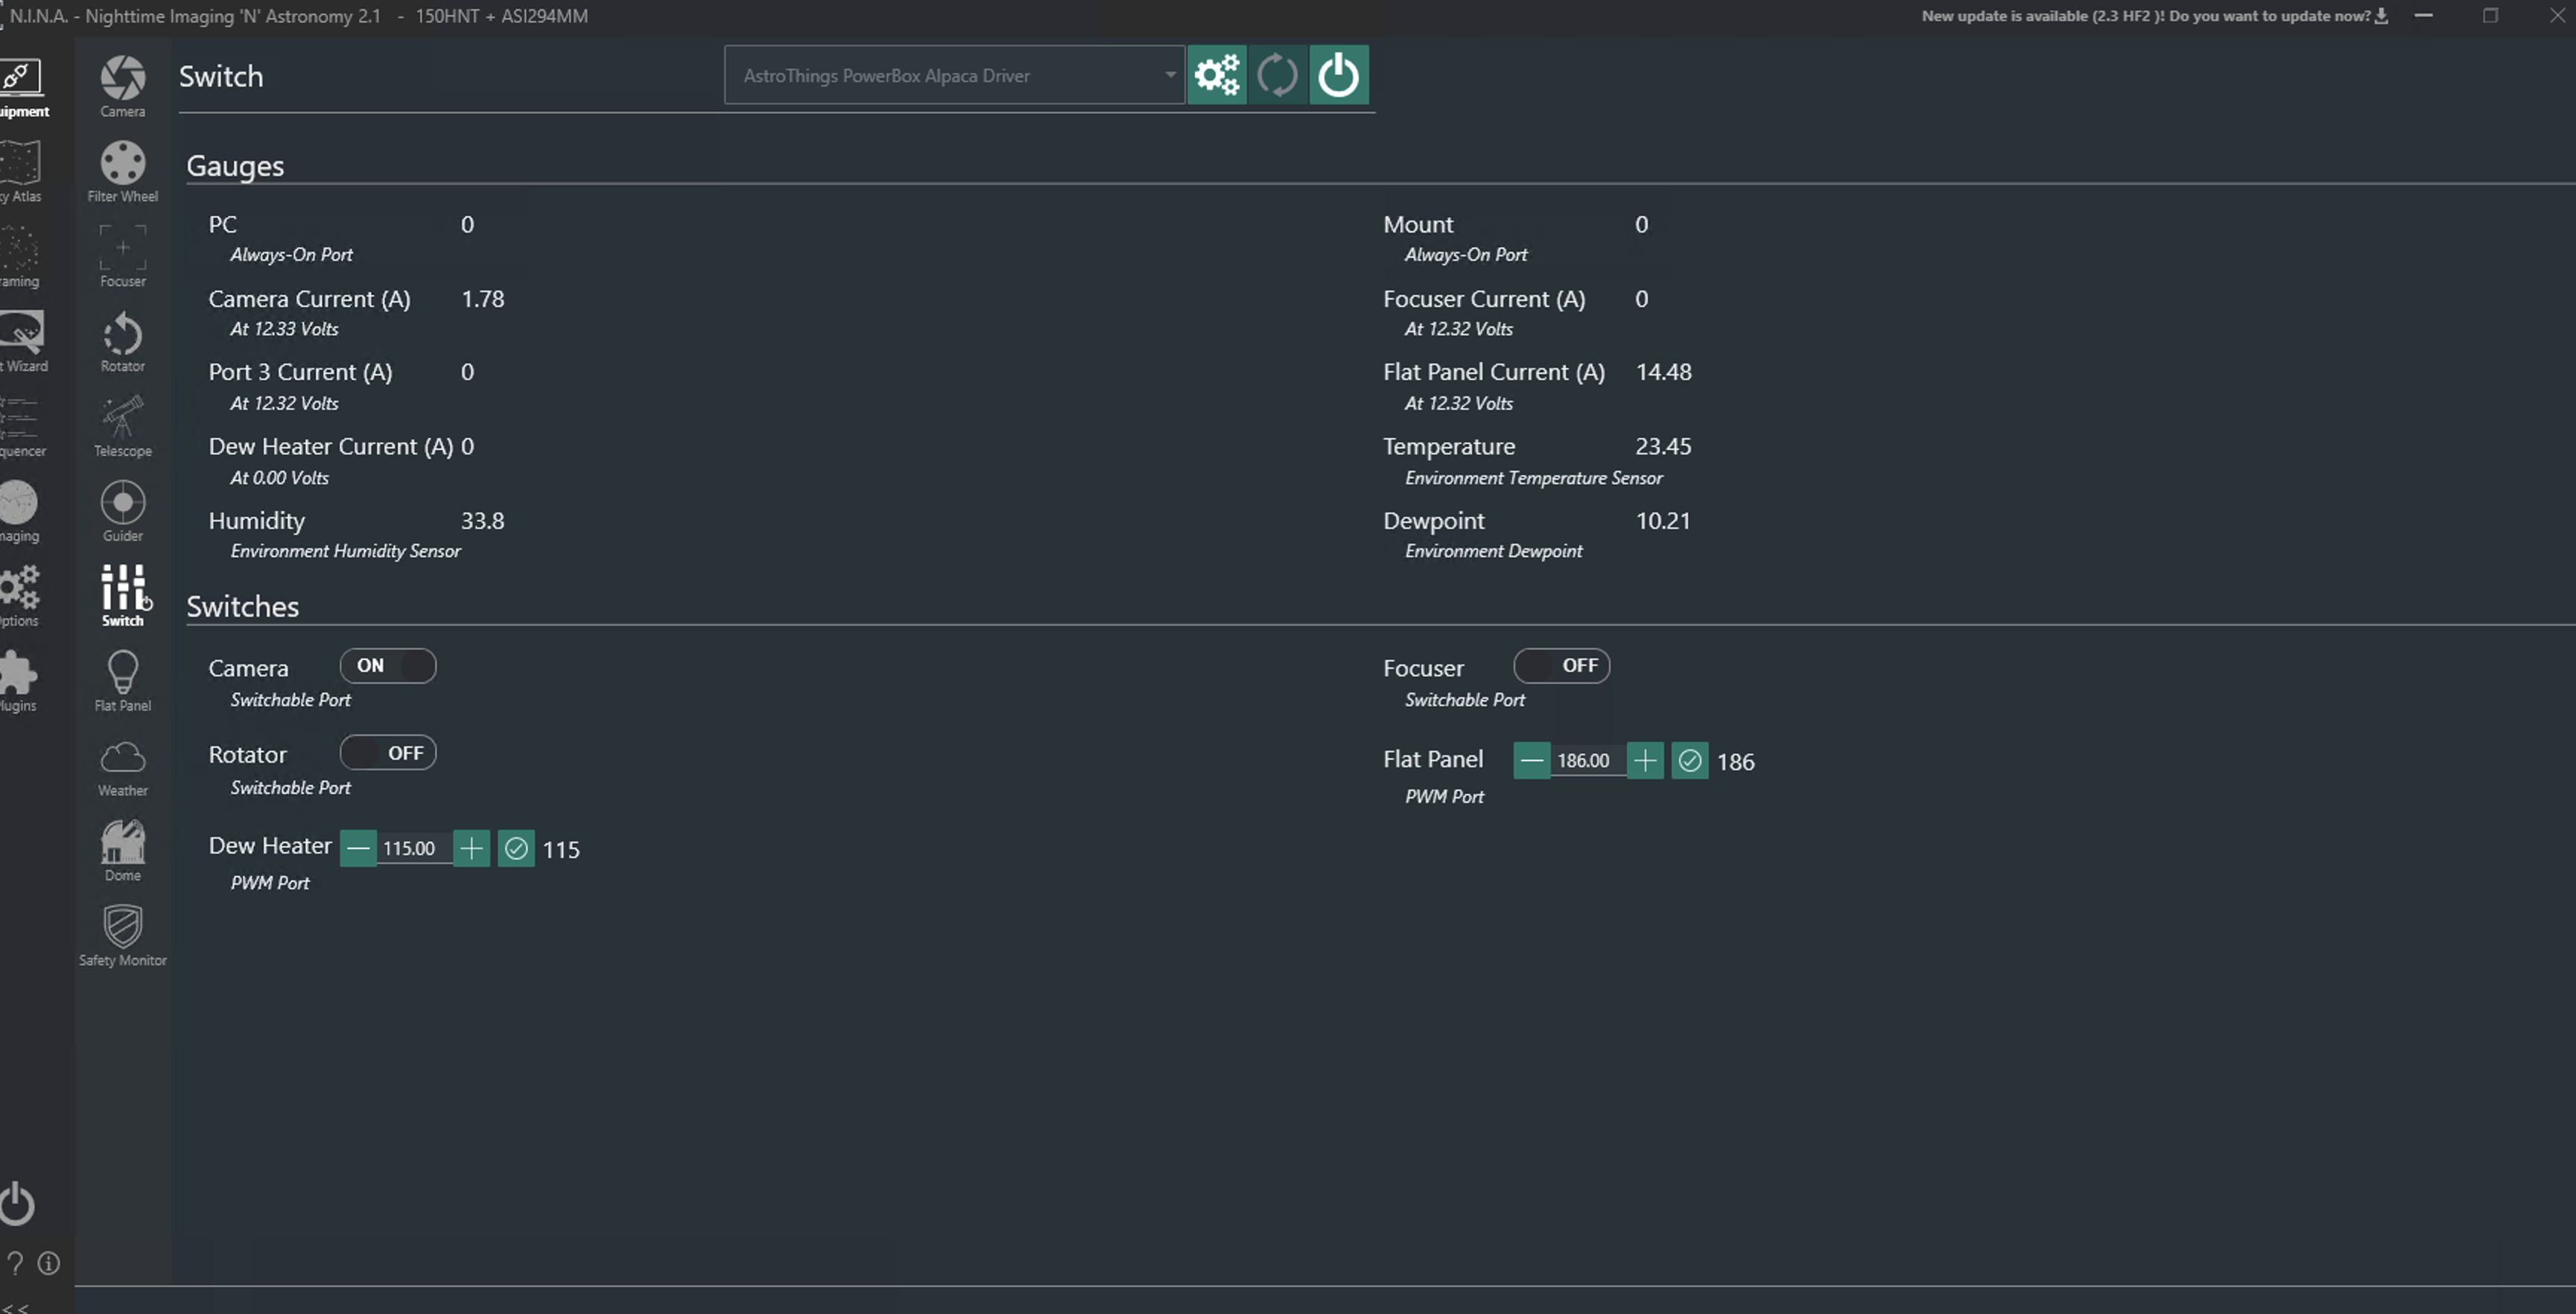
This driver sits in the background, bridging the gap between your astrophotography software (like N.I.N.A.) and the microcontroller.
The flow looks like this:
- The astrophotography software sends a request to the ASCOM driver.
- The driver translates the request and forwards it to the microcontroller.
- The microcontroller processes it, sends feedback to the driver.
- The driver translates the feedback and passes it back to the software.
Sounds simple, right?
Well… yes, for the basics—things like on/off switching and PWM control.
But for all the cool stuff—reading voltage & amps, renaming inputs, monitoring temperature & humidity, smart dew heater control, input configuration, charts, and more—I had to go beyond ASCOM’s limits. That meant either extending the driver’s capabilities or building a separate standalone software to handle advanced features.
3. External Software – Where the Magic Happens
This standalone application bypasses the ASCOM driver and talks directly to the microcontroller.
But here’s the challenge:
- What if you’re also using N.I.N.A.?
- What if you turn on a switch in N.I.N.A.—shouldn’t it also update in our software so everything stays in sync?
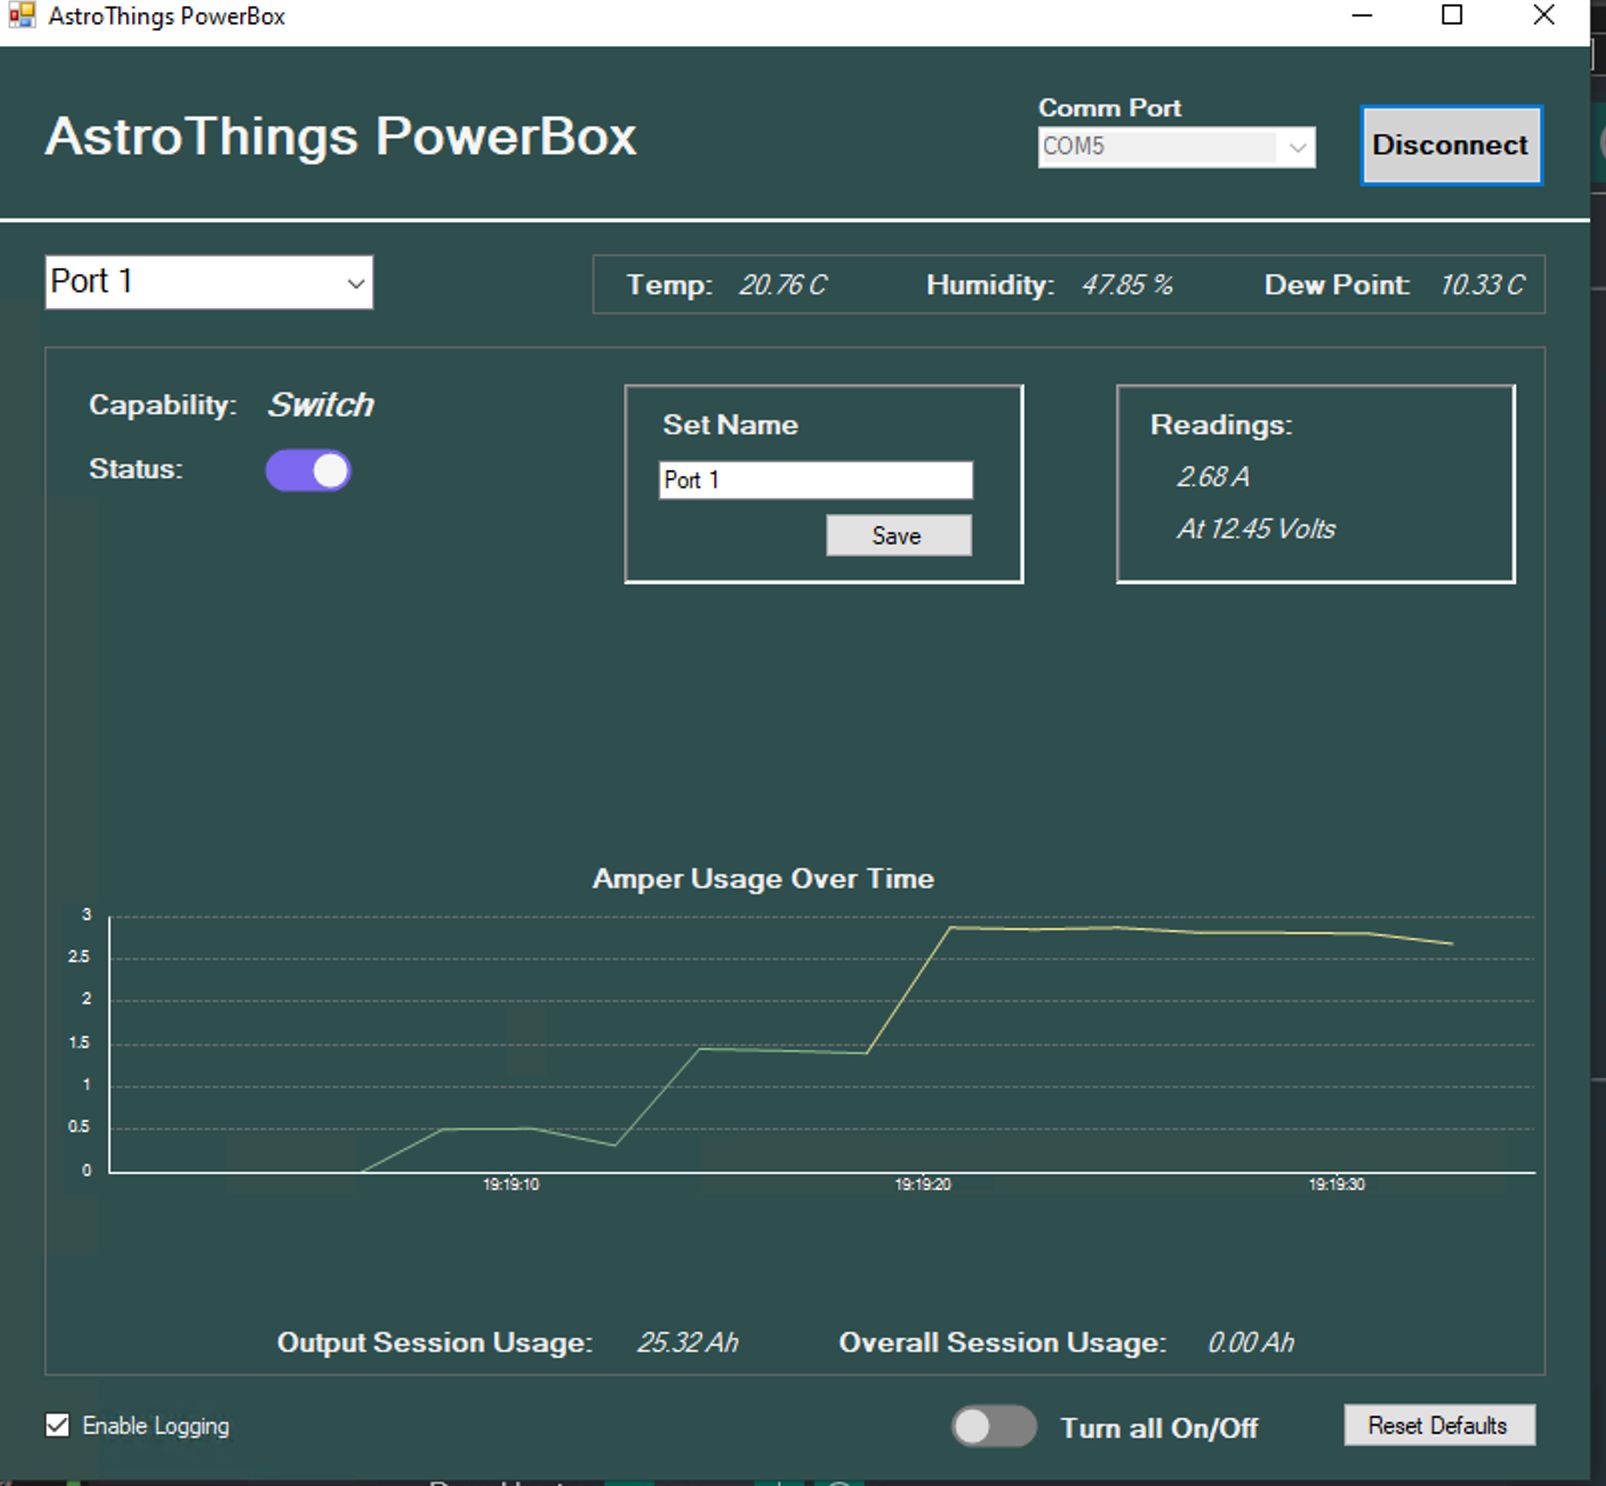
At first, I built the UI with Windows Forms—which, let’s be honest, felt like a relic from 1995. Sure, you can make functional software with it, but it just feels ancient.
Then came the game changer: ASCOM Alpaca.
Why ASCOM Alpaca Changed Everything
Alpaca is the modern version of ASCOM, introducing universal, cross-platform capabilities and eliminating the need for a traditional driver.
That meant I could:
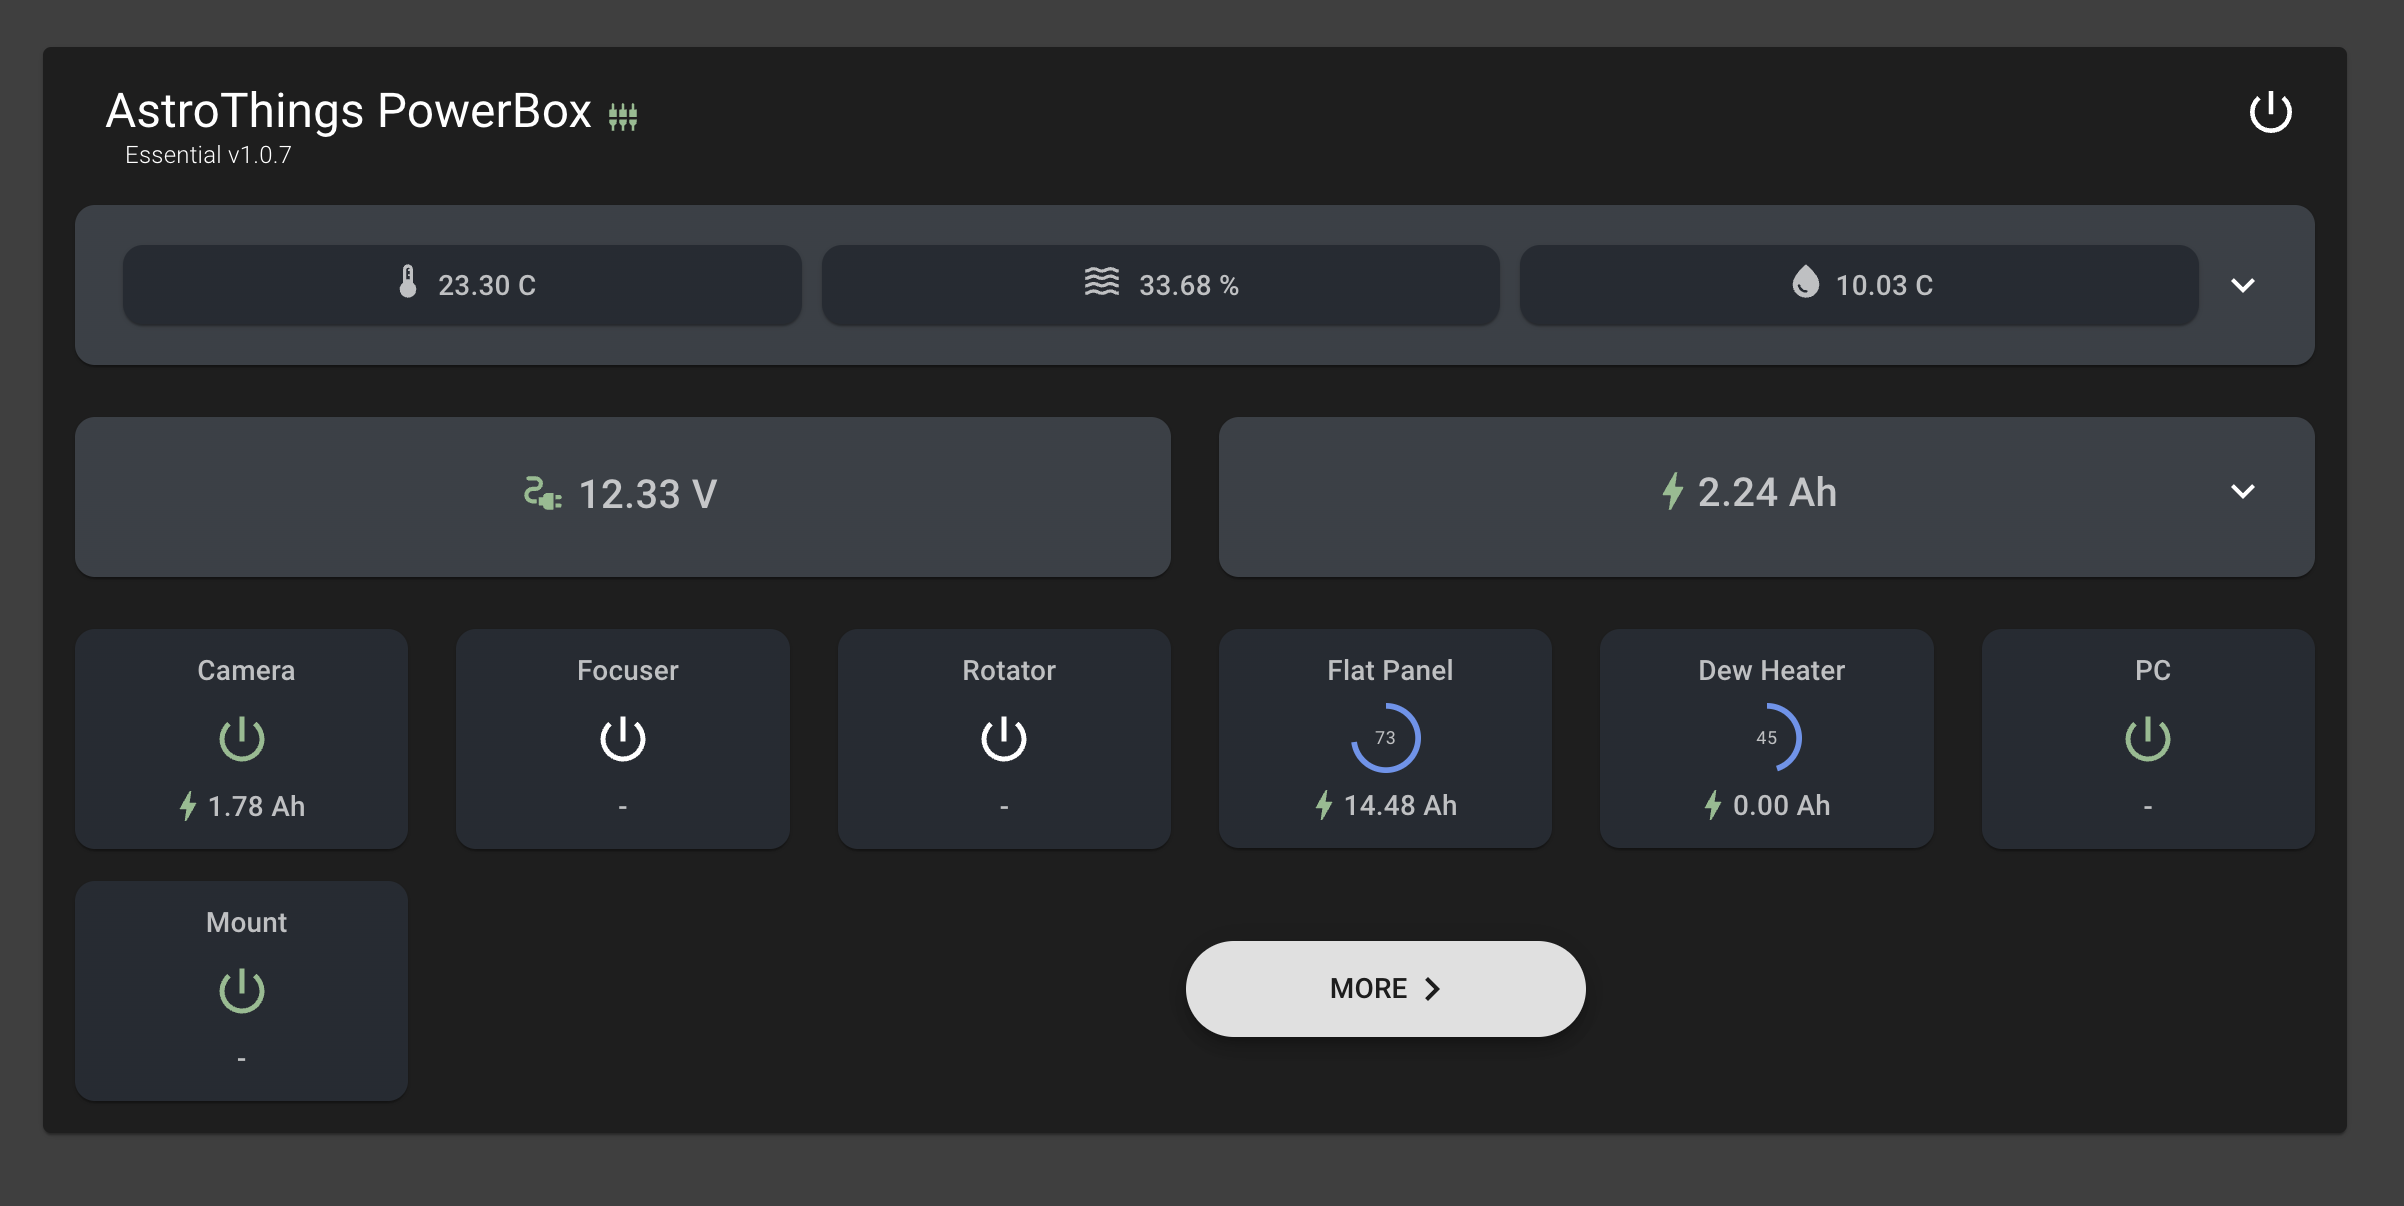
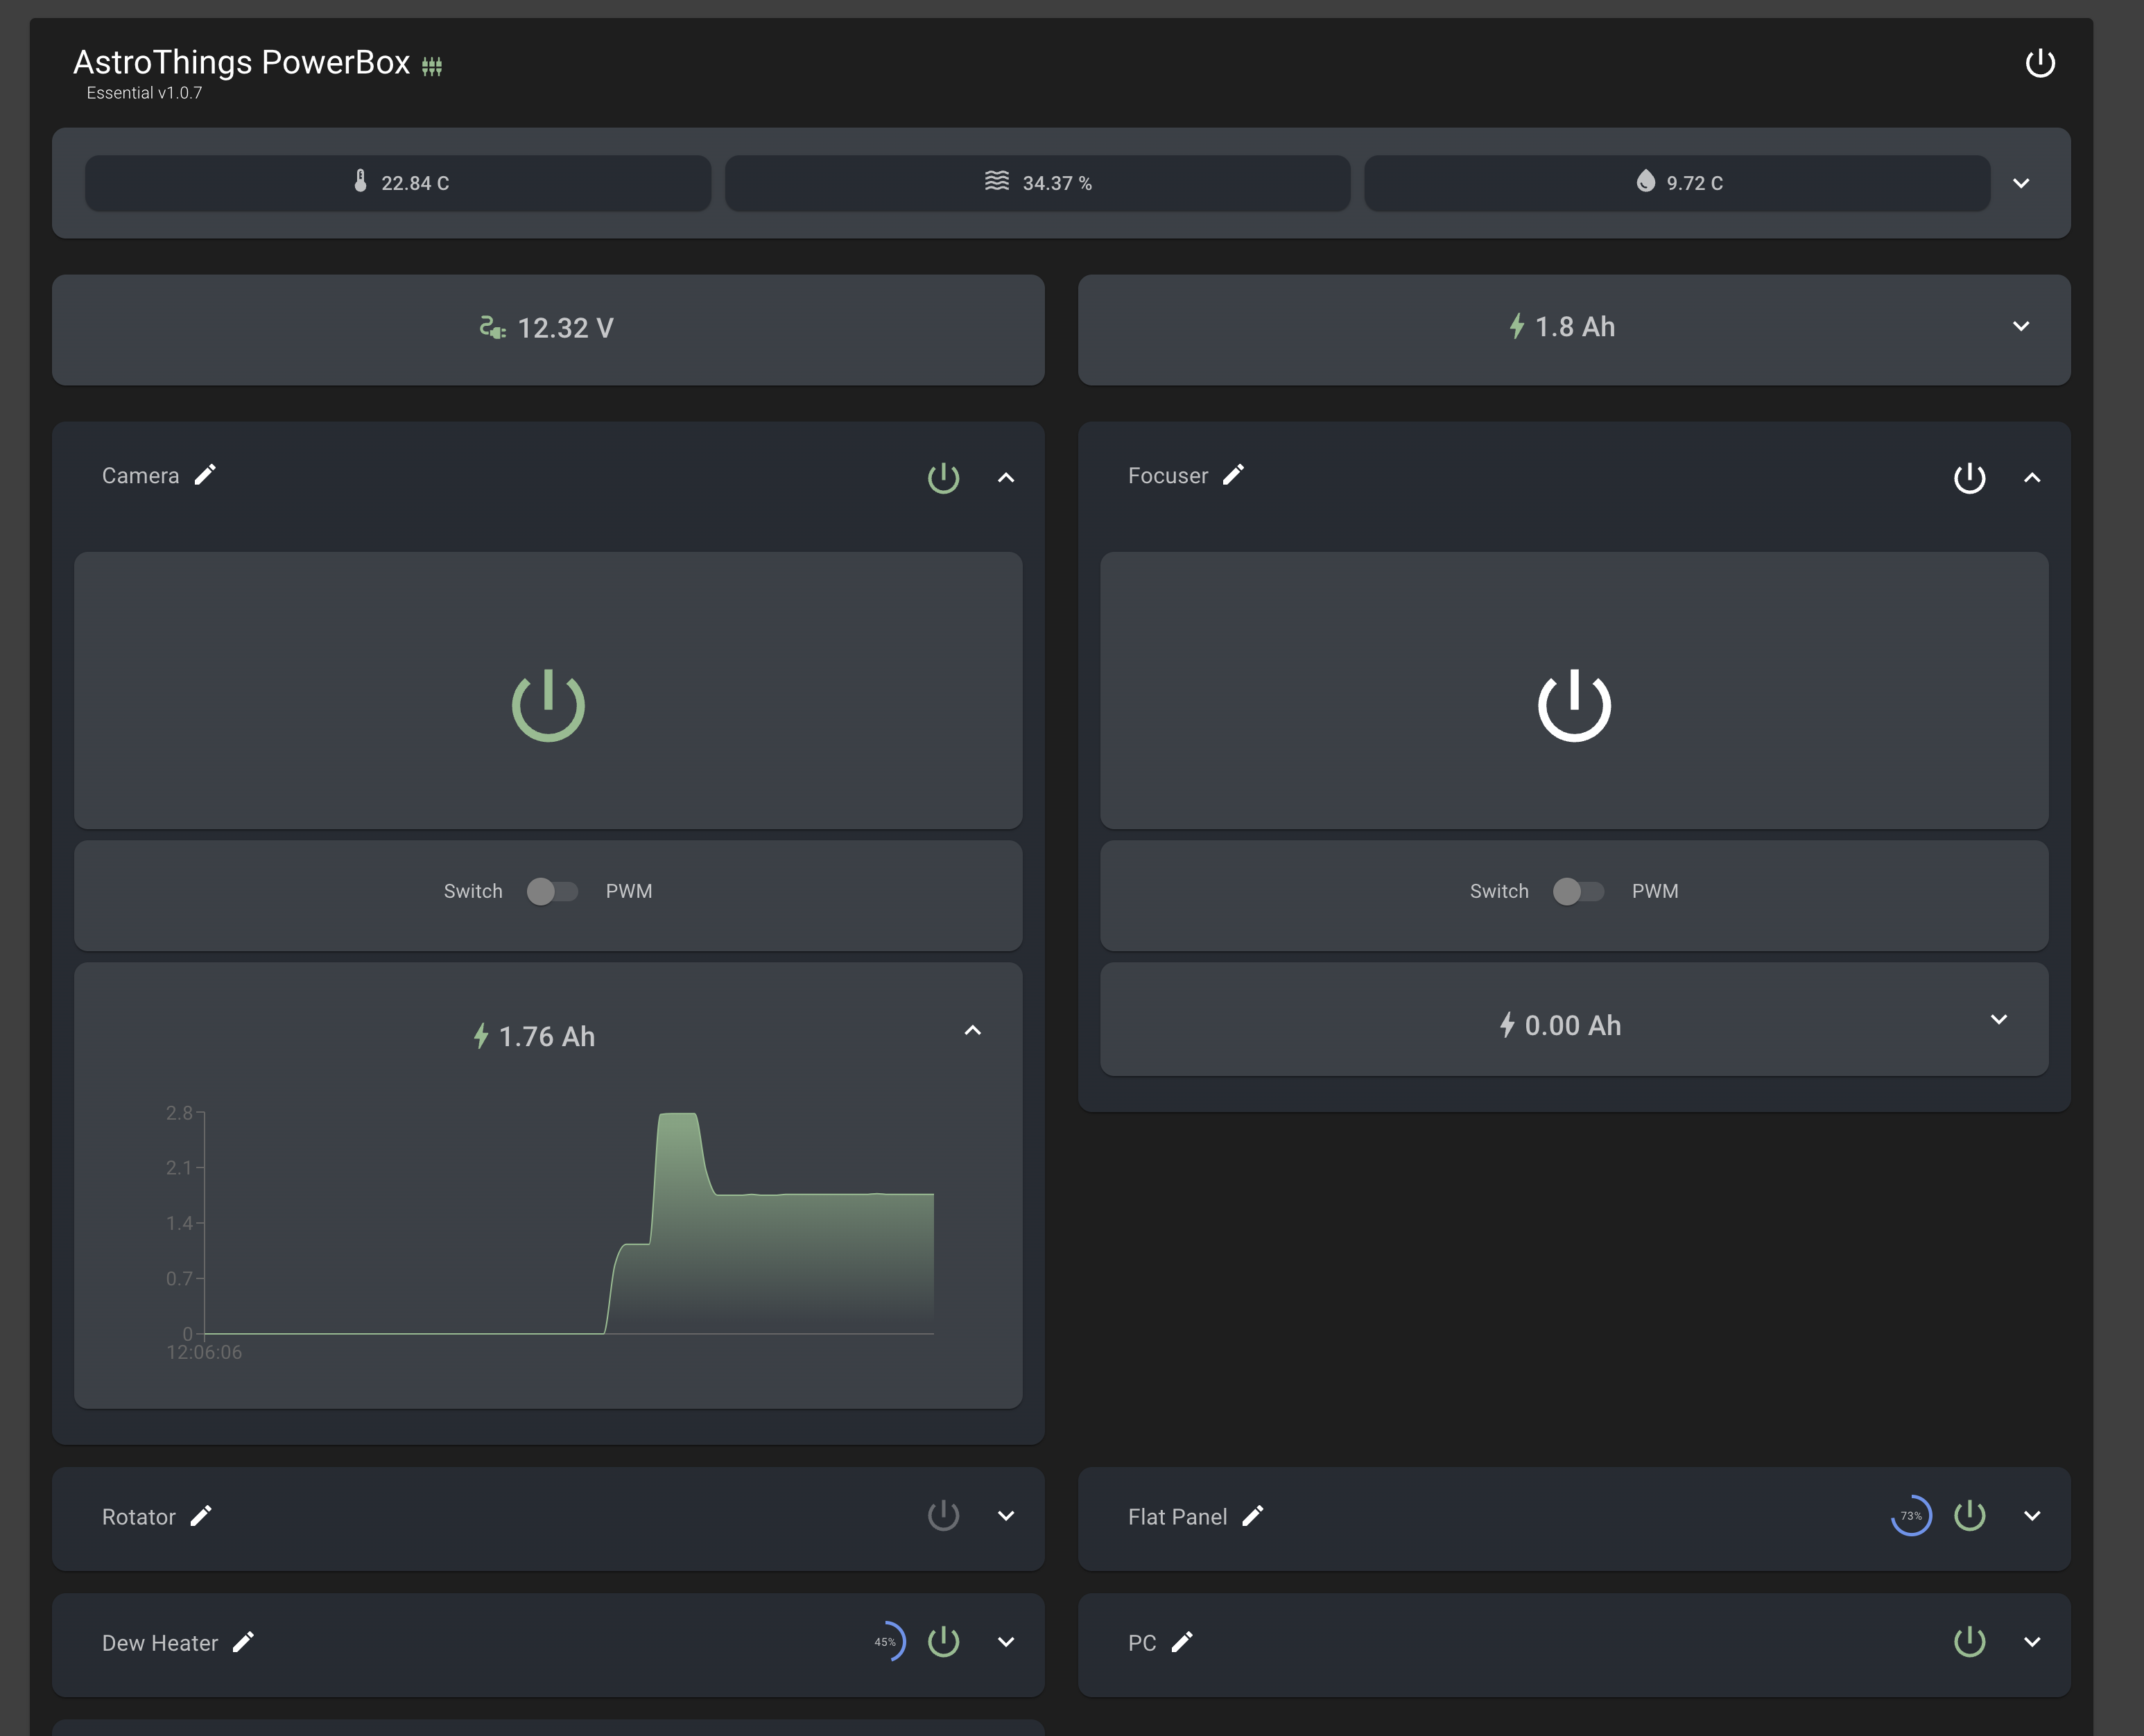
- Build the UI using ReactJS, giving it a sleek, modern interface.
- Make it accessible from any device on the local network.
- Run it on Windows, Mac, and Linux—without changing a single line of code.
Here’s how it works:
- The backend runs a Python web server on the computer.
- This server hosts an Alpaca REST API endpoint, along with custom API calls.
- The ReactJS front end communicates with this backend, offering a smooth, real-time control panel.
Now, all parts of the system can talk to each other seamlessly.
Making Installation Easy for Everyone
Great, but how does the average user even install all of this without getting lost?
I built an .exe installer that does everything for you.
On the first launch, the application checks if all dependencies are installed. If anything is missing, it automatically downloads and installs it.
The only catch? You’ll need an internet connection for installation.
But if you’re in the middle of nowhere without internet? No problem. You can still use the native ASCOM driver as a fallback.
Next Up: A Deep Dive into the Code
Now that we’ve covered the big picture, it’s time to break down the actual code.
Stay tuned!
Send me an email or use the contact form
Want to buy me beer 🍻? Use this link
~ The Bright Knight